Pen Tool in Photoshop
Pen Tool in Photoshop is used to draw a path or to draw an outline. Pen tool was originally created to draw a design of cars.
What is a Path?
A path can be a straight line or a curve line drawn from one point to another. Since, Path is all about drawing a line over an image, it has nothing to do with the pixels underneath it.
Note: When we draw a path on the image and save the image, then the path won’t be visible on the image as it is a temporary path. After drawing a path, we can convert it to a Selection.
Let’s see in example below; how to draw a path using Pen tool. Open below image in the Photoshop.

Using the Pen tool, we will draw an outline of this car and will try to change the background with the outline selection.
As we can see, to draw the outline of the car, we need to draw straight lines as well as curves.
Hence, We must learn how to draw straight line and curves.
Select Pen tool  . Leave the Option bar as shown below:

Pen Tool - How to draw a straight Line?
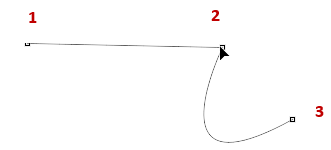
To draw a straight line, select the Pen tool and click anywhere on the canvas to create a starting point. Pen tool will be like this  .
.

Let’s say that the starting point name is point ‘1’. The point drawn by Pen tool is known as Anchor point.

Let’s click at point 2 with Pen tool to draw a path. This is how we draw a straight line.

Pen Tool - How to draw a Curve
To draw a curve line, click at point 3 which is our next point. Now without releasing the mouse button, drag the cursor. When we drag the cursor at point 3, it creates direction handles (2 lines extending in opposite directions). Longer the direction handle, more will be the curve expansion. Hence, direction handle decides 2 things:
(i) Length of the curve (ii) Angle of the curve

(i) Length of the curve
We can extend direction handles to extend Length of the curve. In below pic, we are extending the direction handles at point 3 to increase the curvature of the curve.

(ii) Angle of the curve
We can rotate direction handles to rotate the curve. Hold "Ctrl" (Win) / "Command" (Mac) key and rotate either of the direction handles around the anchor point. As we rotate one handle, other will also rotate in opposite direction and the curvature of the curve will change.
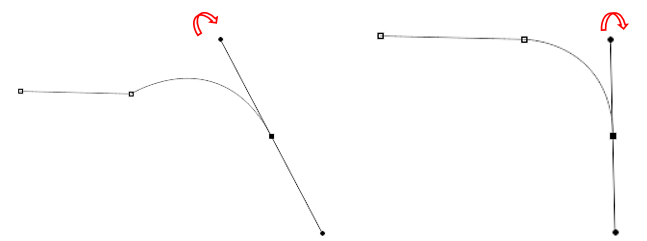

Pen Tool - How to draw a continues Curve?
Suppose we have drawn straight line and then 1 curve as shown below. To draw another curve in continuation, first we delete 2nd direction handle of point 3 i.e. we delete ‘B’.
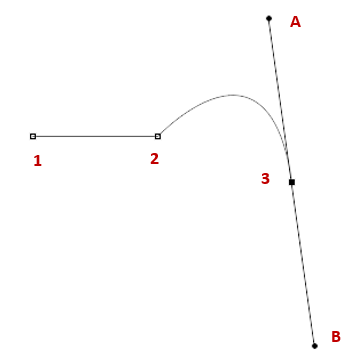
To delete the direction handle B, hold Alt key and then click on the anchor 3 toward point B. See the point where we click.
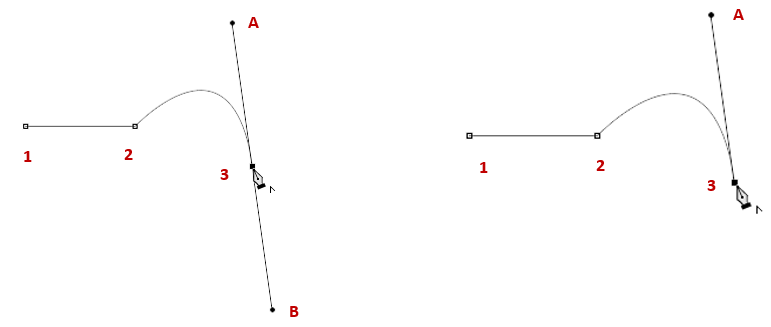
Once the handle B is deleted. Now use pen tool to click on the next point and without releasing the mouse pointer drag it to create a curve. See below

Pen Tool - How to change curves in intermediate points?

Pen Tool - How to activate an anchor point?
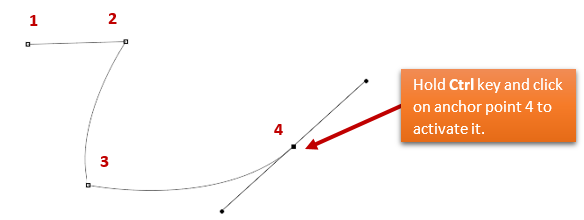
If you want to activate anchor point 4 after adjusting the curvature at point 3, then hold "Ctrl" (Win) / "Command" (Mac) key and click on anchor point 4. Anchor point 4 will turn into solid square, which means that the anchor point 4 is currently active. Also, direction handle will appear see below.
Pen Tool - How to change control the curvature on either side of an anchor point?
Let's activate point 3 now. We want to change the urvature of point 3 on both side. To activate point 3, hold "Ctrl" (Win) / "Command" (Mac) and click on point 3.
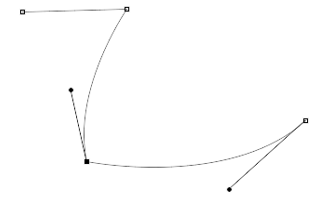
Here, we have only one direction handle. Hold Alt key and drag the anchor point 3 to recreate 2 handles in opposite direction. See below:
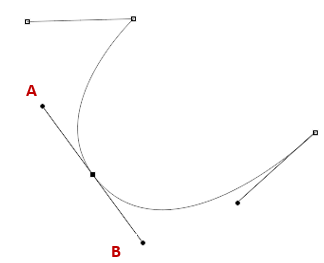
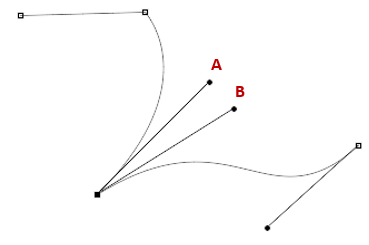
Now hold Alt key and rotate handle A to affect the curvature on its side. Similarly, hold Alt key and rotate handle B to affect the curvature on its side.
Pen Tool - How to add and remove intermediate anchor point?
To add an anchor point at an intermediate position, click anywhere in the middle of the curve. The cursor will appear as  (Plus + sign on Pen tool). See below, we create a new anchor point.

To remove anchor point, just take the pen tool on that anchor point and when the cursor changes to  (Minus sign – on Pen tool), click there to remove it. See below:

Pen tool Example Continues …
Now, as we have the basic concept of how to draw straight line and curves, let continue our example and draw the outline.
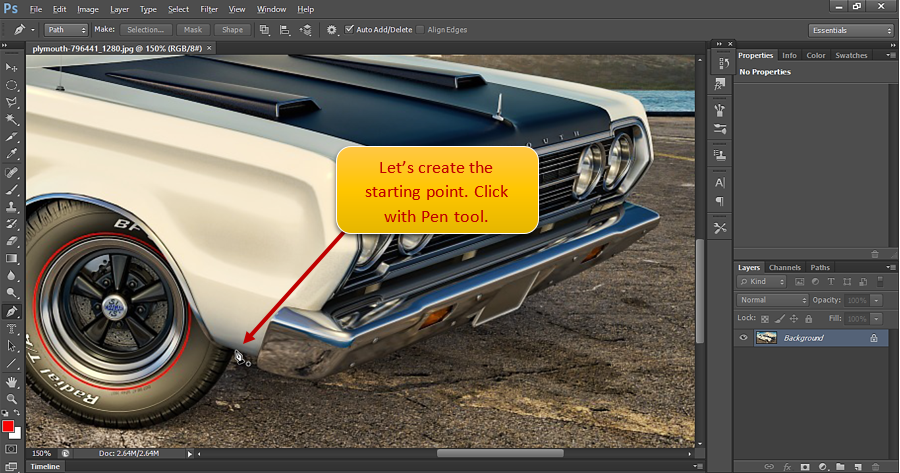
Now draw the path as shown below.
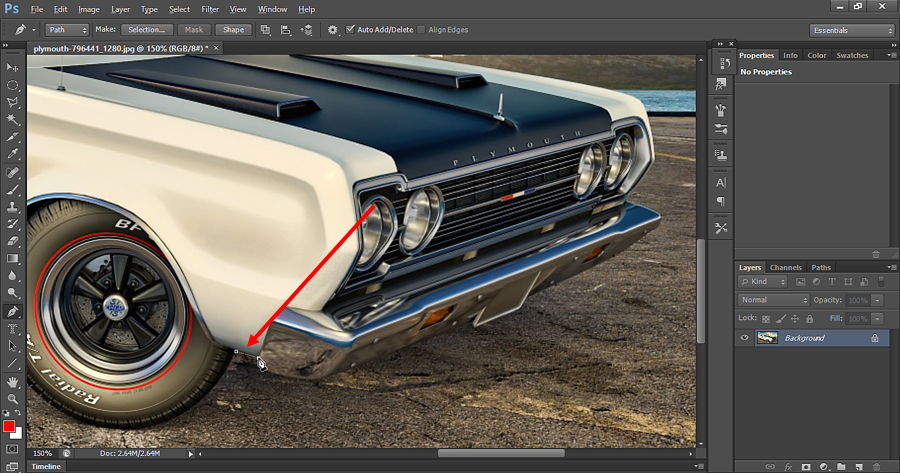
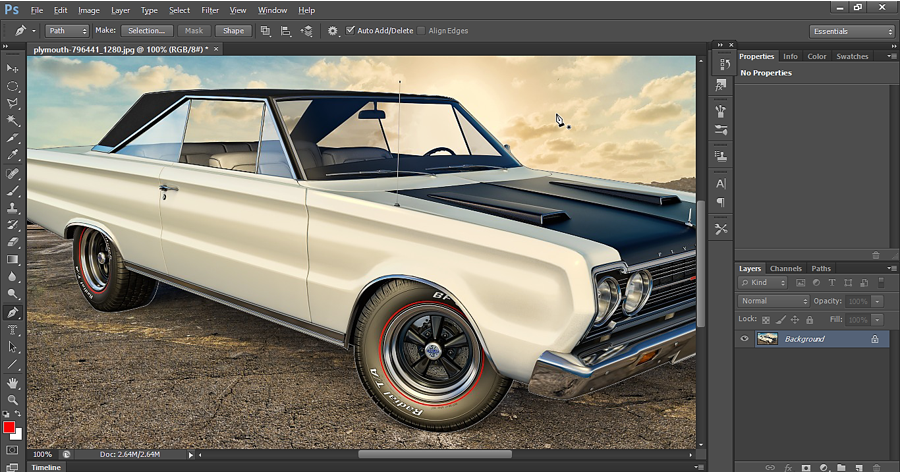
Below is the complete outline for the car. The outline is very light and hence you many find it difficult to visualize it on the edges.
Go to the path panel to see the work path created.
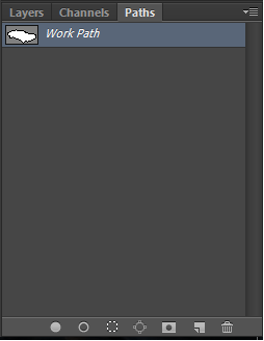
The path with the name ‘Work Path’ is temporary. To save the work path double click on the Work path icon. It prompts to save the path as shown below. Let’s save it. If we don’t save the path and draw a new path then the old path will be deleted and new path will be loaded with the same name ‘Work Path’ in path panel. Hence we must save the old paths.
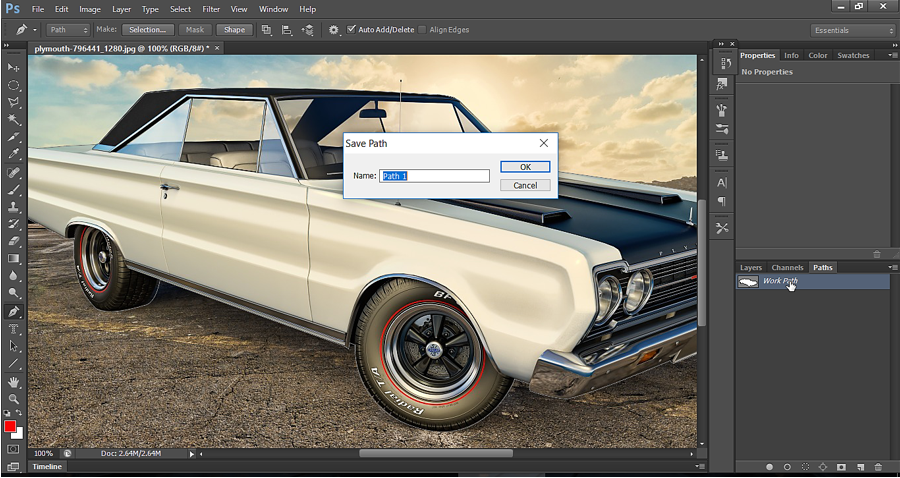
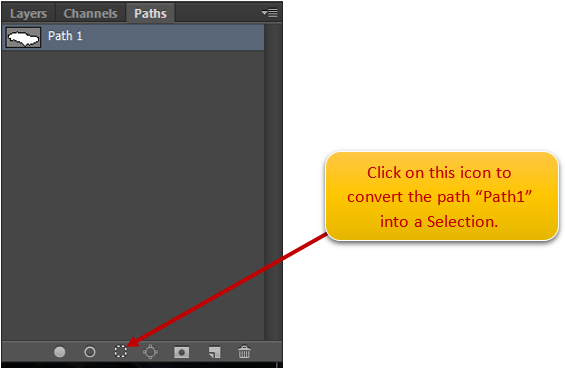
Once we have saved the path, click on the icon at the bottom of path panel to convert the path “Path1” into a Selection.
Below is how the Selection look like after converting path into a selection.
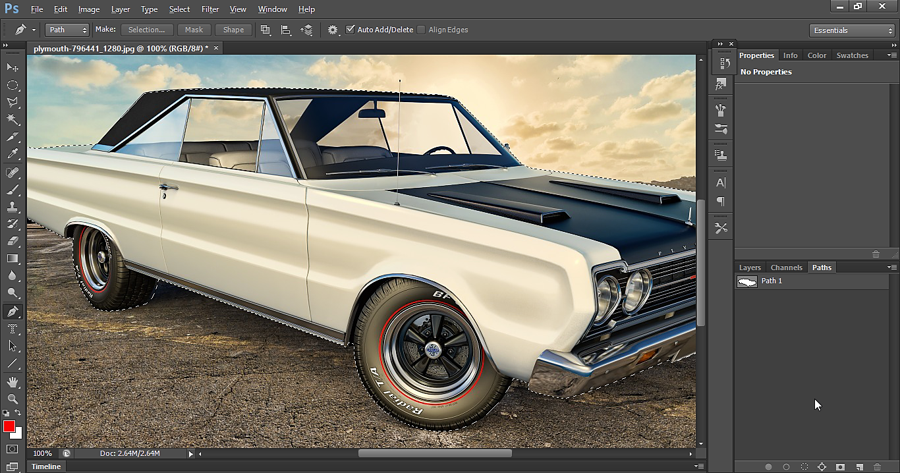
Now copy this selection. Go to Edit -> Copy to copy the car.
Open a new background image in a new tab as shown below.
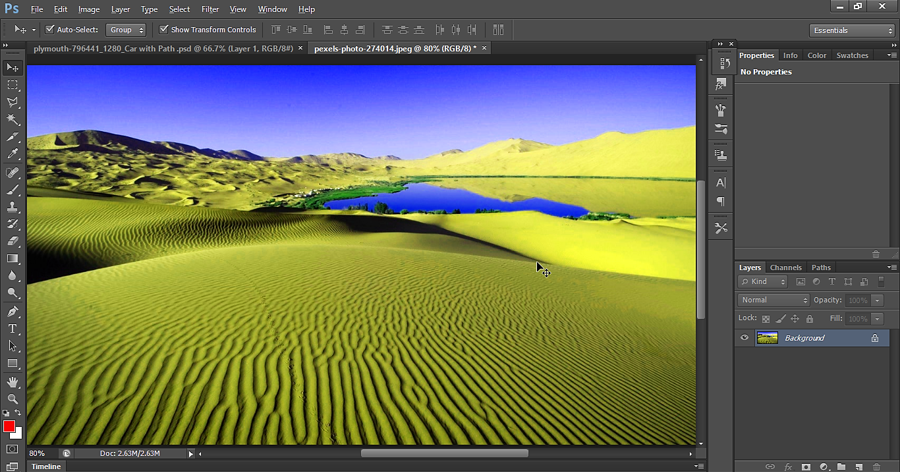
Then paste the car into this background. To paste, use Ctrl+V, or go to Edit -> paste.
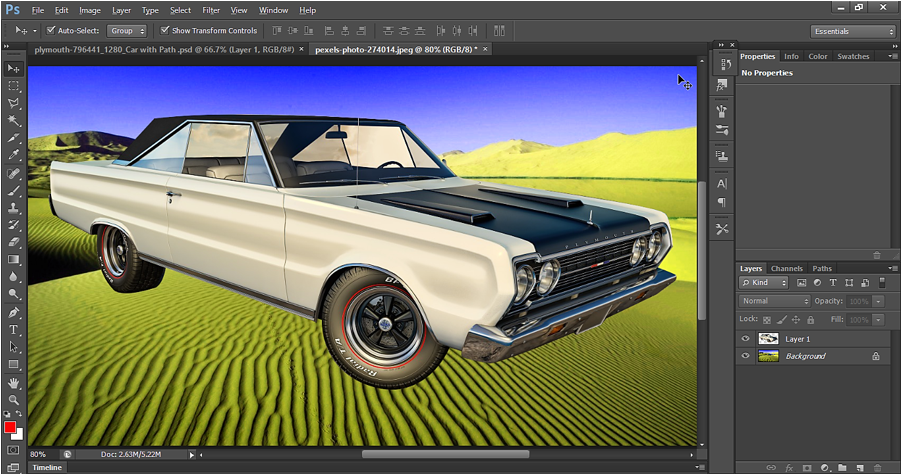
Pen tool Output:

Tools to Control the path:
There are two tools in Photoshop, which we can use to control the path.

(a) Path Selection tool
Path Selection Tool in Photoshop is used to move the path selection. To move a path in any direction, hold the left mouse button and drag the path in any direction to move it around.
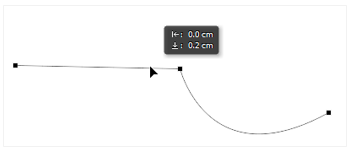
(b) Direct Selection Tool
Direct Selection Tool is used to select, move or modify paths or shapes. With this tool, you can select individual Anchor points in a path/shape and manipulate it. E.g. We hold the point 2 and move it to change the path as shown below.
