Adjustment Layer in Photoshop
Adjustment Layer is a kind of layer which contains the information related to any adjustment done on the Layer. We can do various adjustment on the layer as per our need e.g. contrast/brightness adjustment, color/tone adjustment, black & white adjustment, Hue/Saturation adjustment etc.
Here, all the adjustment is not done directly on the main image, rather it is done on a separate layer. This separate layer contains all the adjustment related information. The adjustment layer applies these adjustments the layer underneath it.
Example- Adjustment Layer in Photoshop
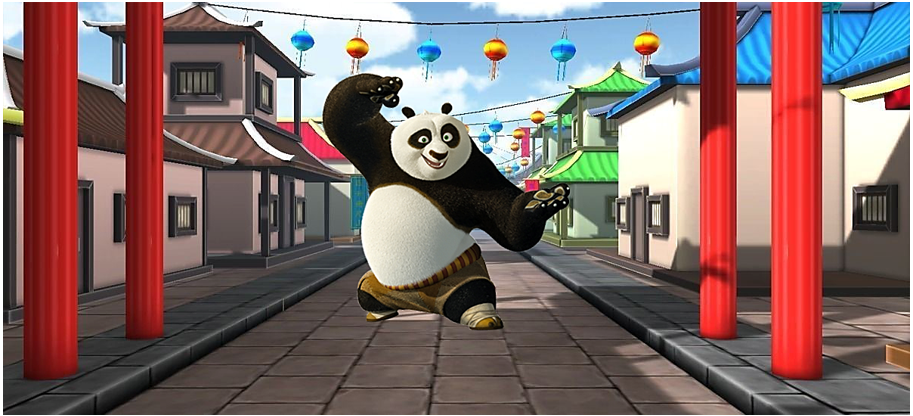
Open below image in Photoshop application.
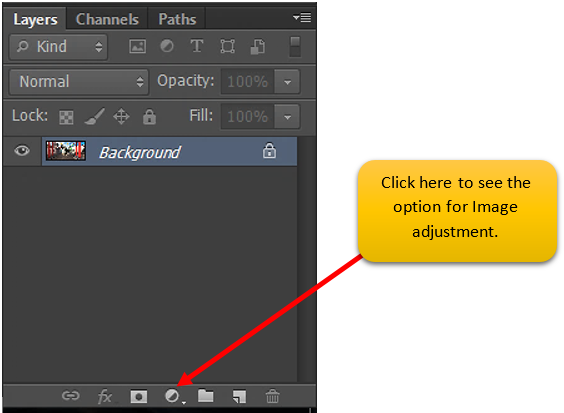
Click at the half circle icon  appearing at the bottom of Layers panel. After clicking, we can find many Image adjustment options.
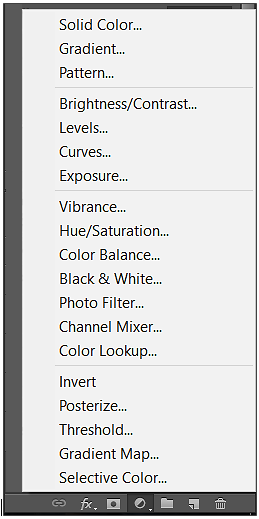
Below are the Options available for image adjustment:
(1) Gradient
Select the current layer and then click on image adjustment icon at the bottom of the Layer panel and then select Gradient option as shown below:
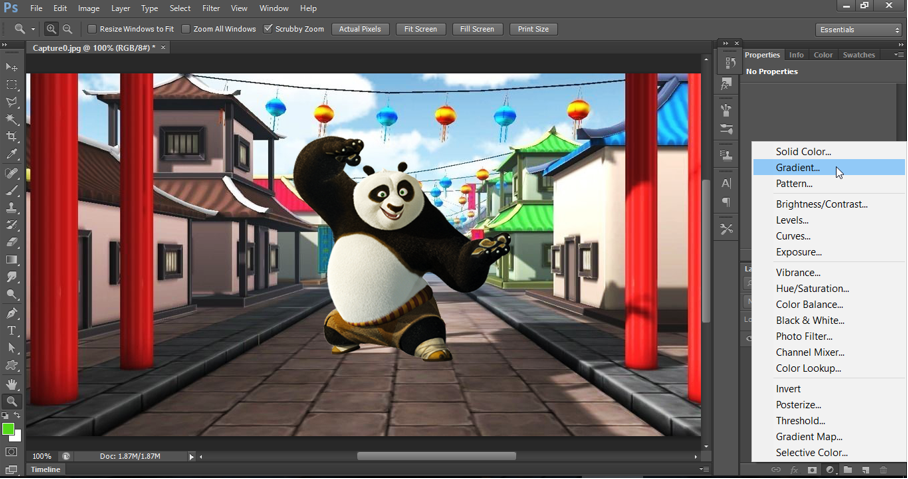
When we select Gradient, a new layer is created on the top of background layer. This new layer is gradient adjustment layer.
In Gradient Fill, select spectrum from Gradient drop down list. See below:
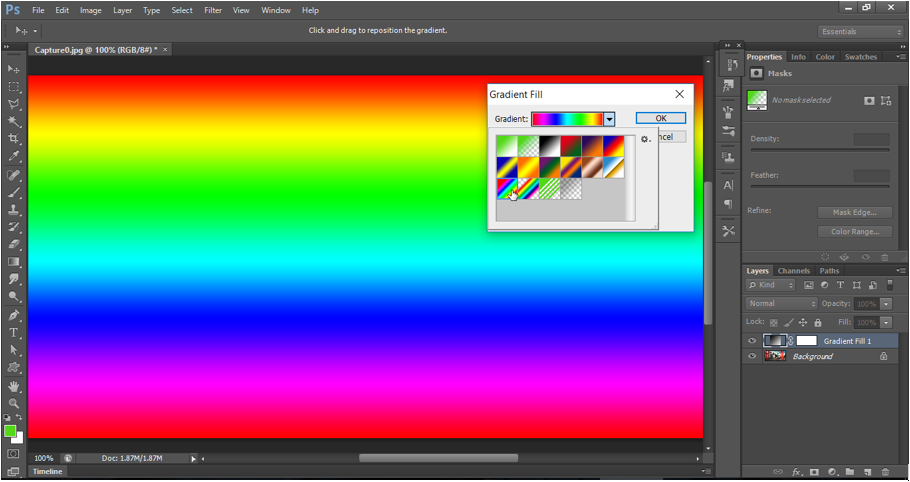
Now set the Fill or opacity to 30% to get below output. See below:
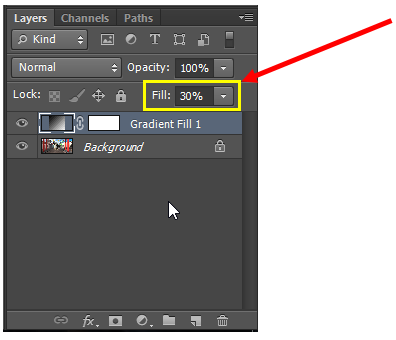
Output - Gradient Adjustment Layer

*Note1: Separate gradient layer let us modify the gradient individually and hence make the image adjustment maintenance easier.
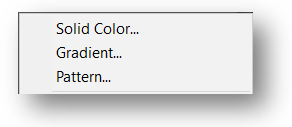
*Note2: The first 3 options in the adjustment group are used to Fill the layer with solid color, Gradient or Pattern. In each case, a separate layer will be created to manage these adjustments in the image.
(2) Curves
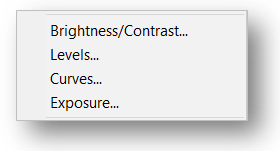
This is another image adjustment feature. It is used to make an adjustment in color/tone of the image by lightening or darkening it. By using this, we can make the light color lighter and dark color darker, hence giving a contrast effect to the image. Therefore, it has been put under the group where brightness/contrast is.
*Note1: The options 4 to 6 in the adjustment group are used to control the Brightness/contrast. In each case, a separate layer will be created to manage these adjustments in the image.
Example 1 – Curves in Photoshop
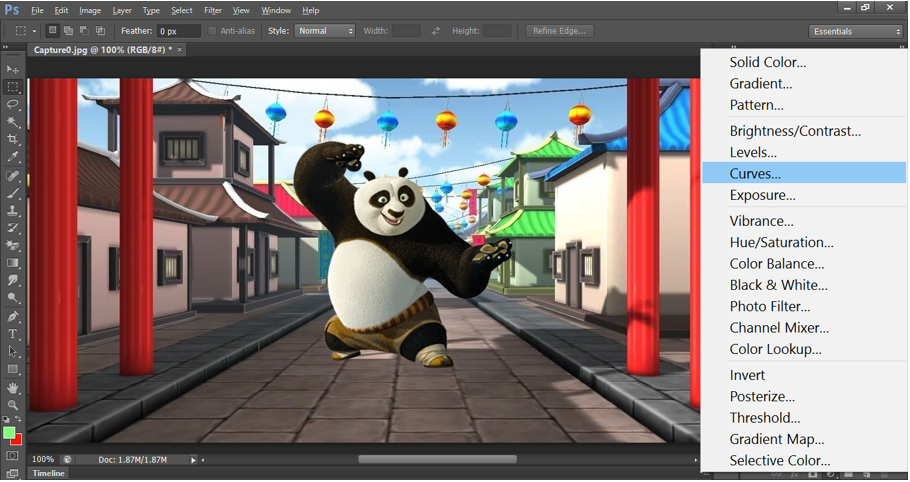
Let’s open Panda image in Photoshop. Select Curves this time.
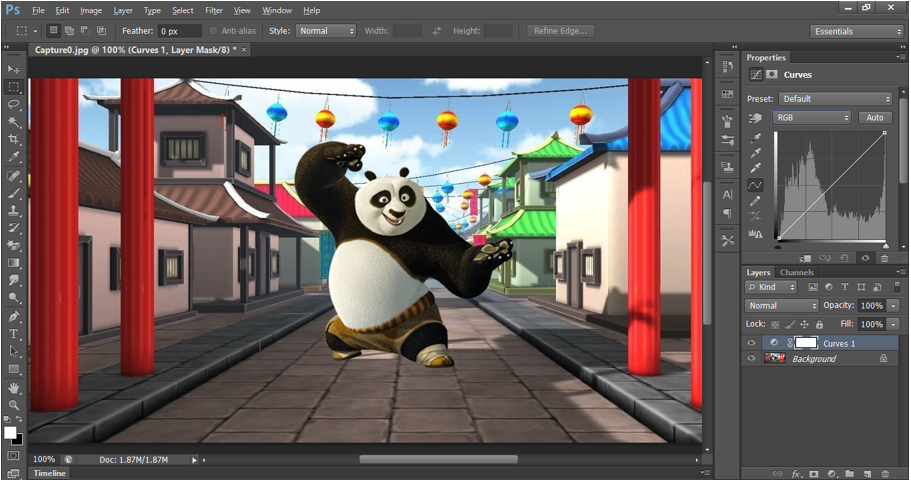
A new layer is created to control the Curves of image.
Drag the Curve at the center in different direction to see the effect.
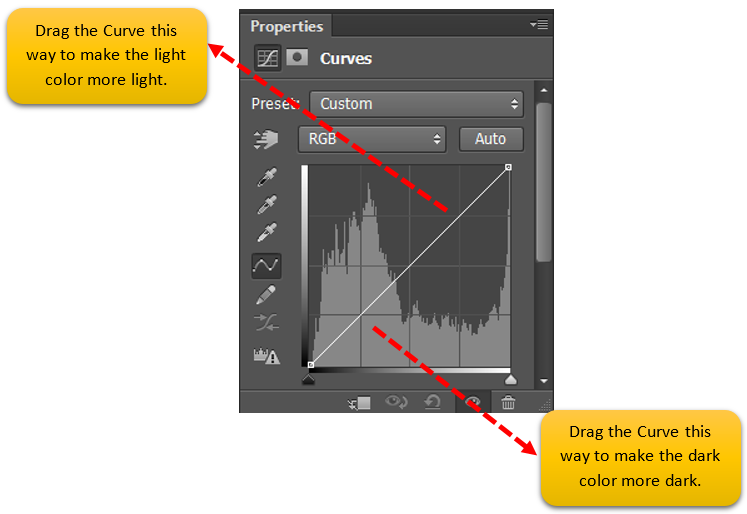
Below is the final Output of adjusted Curve. We can see the adjust curve on right side. Clearly, we get more contrast in the image.
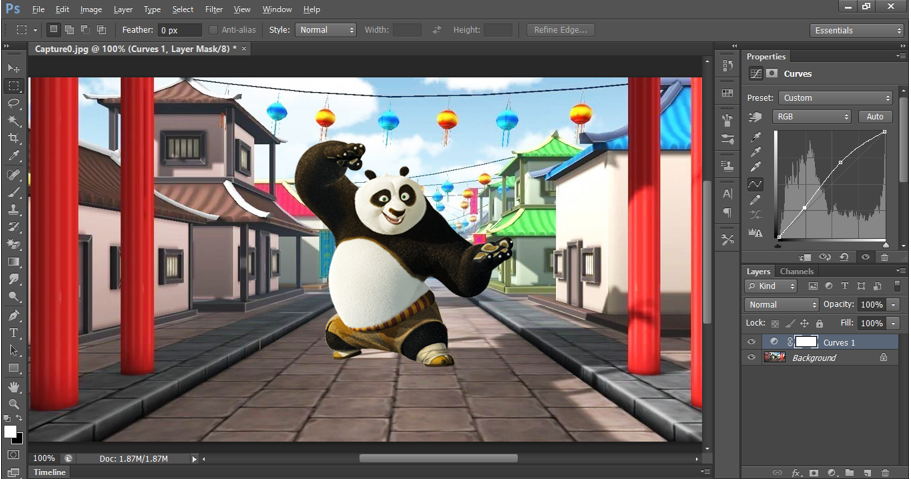
Output: Curves in Photoshop

Let’s see how Curves affects below pic. We do curves adjustment and get some good result.
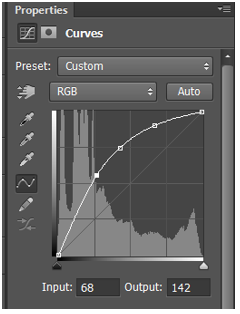
Output: Curves in Photoshop
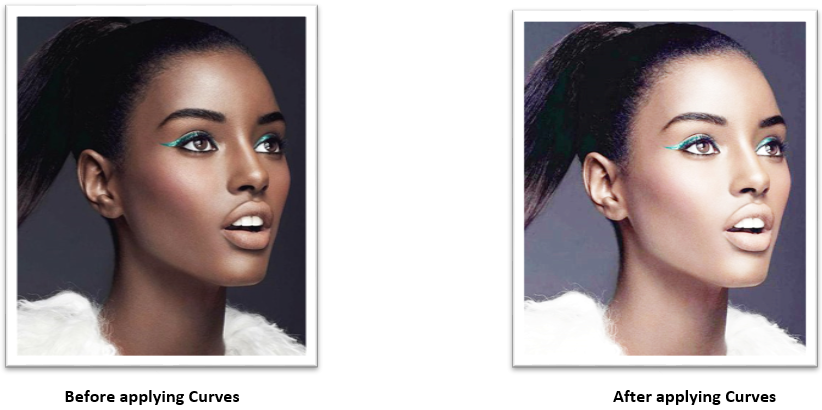
Example 2 – Curves in Photoshop with hand slider option
We can pick any tone in the image using picker and can adjust the Curves for that picked tone only. Then hand slider option in Curves make it possible.
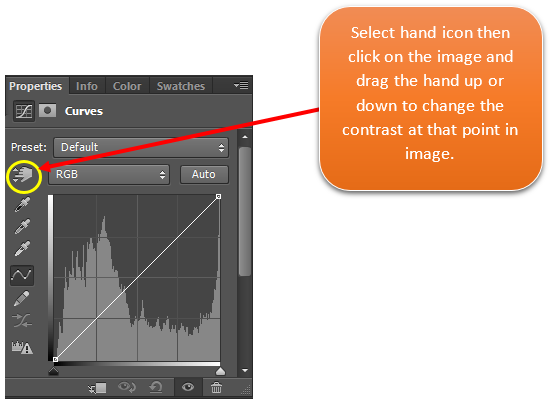
When we select the hand slider option  and goes to image then the cursor changes to color picker. As we pick the color anywhere in the image, the control pint the curves line moves.
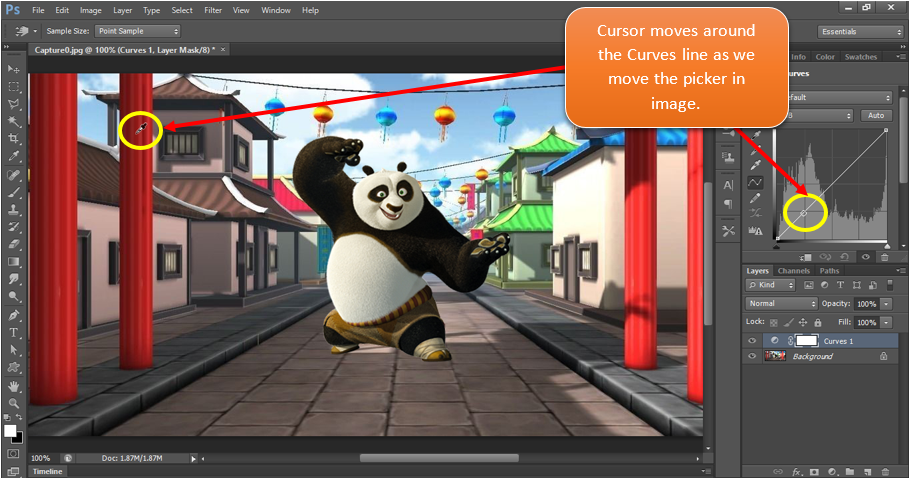
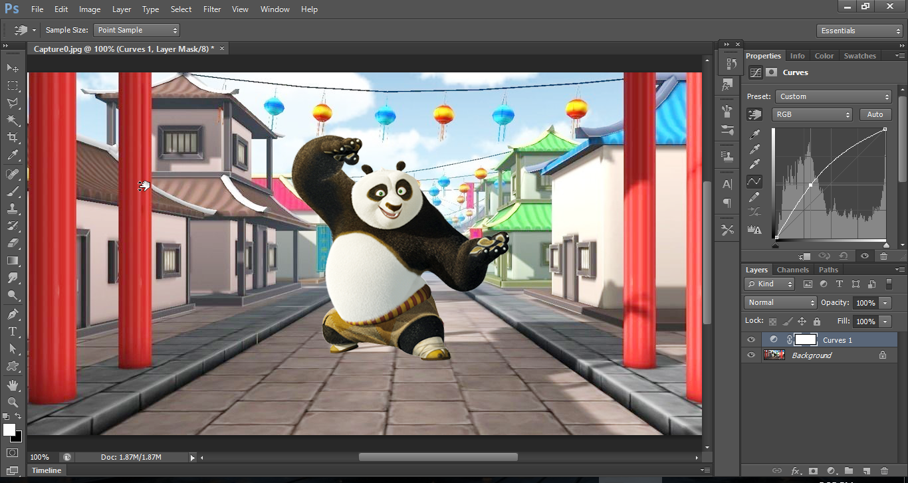
Now while holding the Left click, drag the hand cursor in Up or down to manage the contrast of the image. You will notice that Curve also goes up or down, as we drag the hand cursor up or down on the image.
(3) Levels
It has the same effects use as illustrated earlier in Curves section.
Select Levels as shown below.
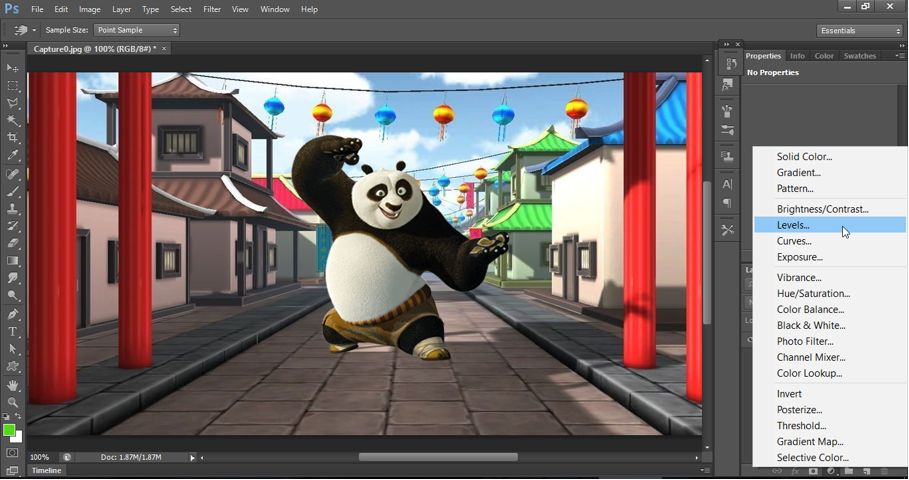
It adds new layer to manage the Levels. Below is how the Levels panel look like.
In Levels panel, we have 3 sliders to control Black Tone, Mid Tone(Grey) and White Tone. Default value of Black will be 0, Grey 1 and White 255.
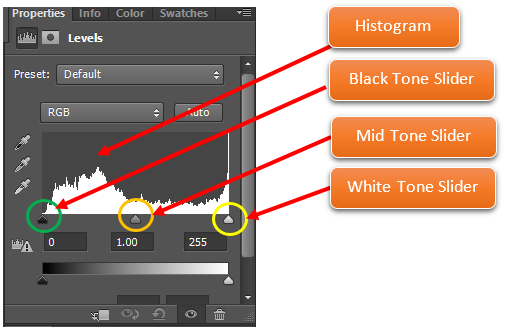
Also, we can see a preview of Black, Grey & White tones distribution in the image, in form of a graph, called as histogram.
In above histogram, we can see that majority of the spikes are in between black and grey area, making the image a little bit darker. To put some contrast in the image, we must adjust these sliders. Let’s see the effect of moving these sliders.
(a) Effect of moving Black slider
Move the Black slider to point 89. When we move the Black slider to the right then all the tones outside the Black sider which is the leftmost part of the histogram, becomes Black. Hence, image tones in the range of Point 0 through 89, becomes Black.
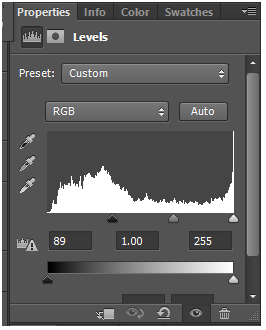
Output: Moving Black slider to the Right
See in below image, how the black tone is spread over the image.
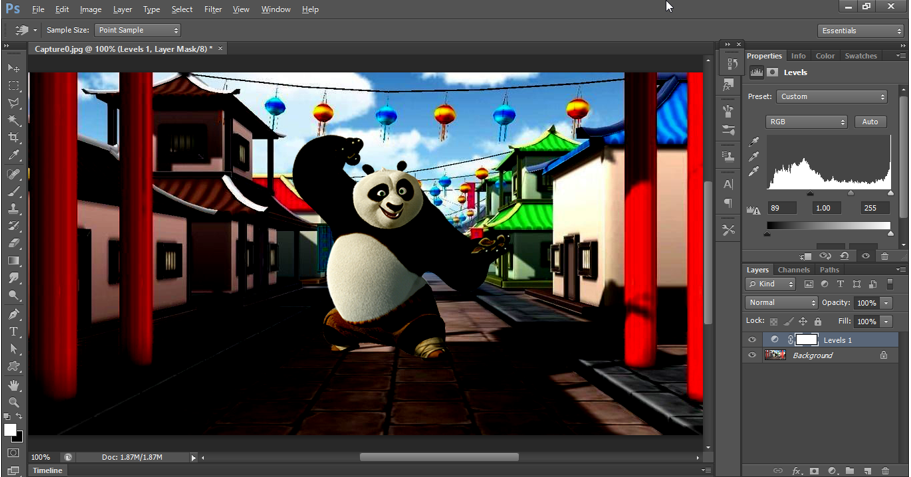
(b) Effect of moving White slider
Move the White slider towards left at point 175. When we move the White slider to the Left then all the tones outside the White sider which is the rightmost part of the histogram, becomes White. Hence, image tones in the range of Point 175 to Point 255, becomes White.
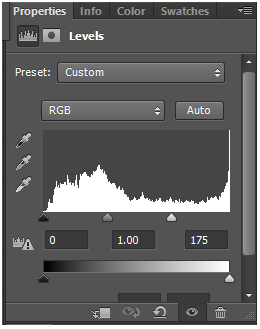
Output: Moving White slider to the Left
See in below image, how the whitish tone is spread over the image.
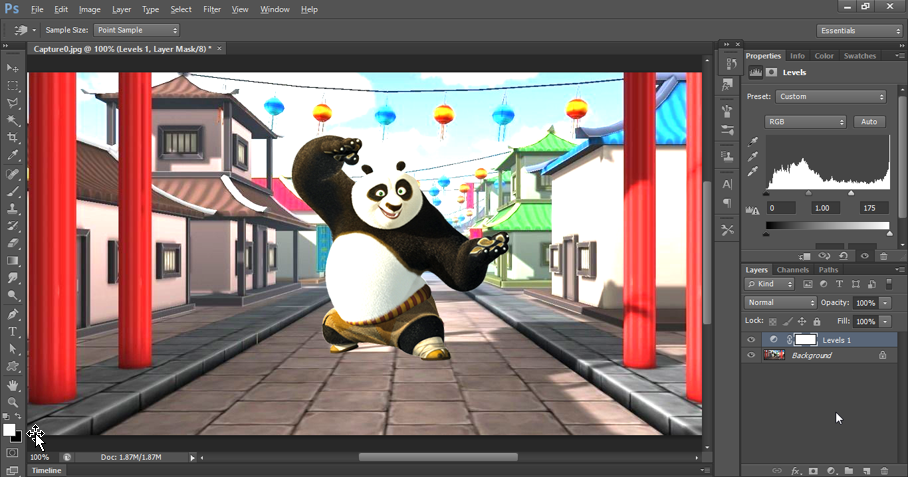
(c) Effect of moving Mid tone slider
When we move the Mid tone slider to the left, then the distance between black and Mid tone shrinks. It means less part of Mid tones in image, will be of dark shade. Same way, the distance between white and Mid tone expands making more part of the image whiter mid tone.
Below we have moved the Mid tone slider to the left.
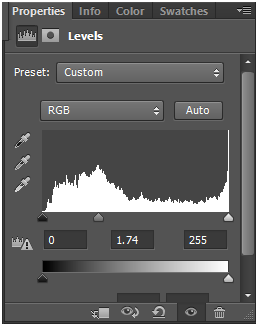
Output: Moving Mid tone slider to the Left
See in below image, how the Mid tone is spread over the image.
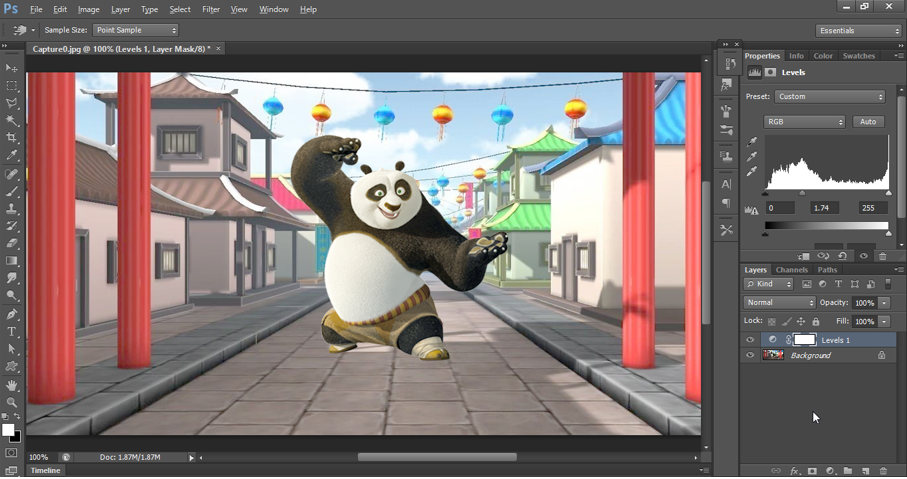
(d) Effect of adjusting Black tone/Mid tone/White together
When adjust Black, Mid tone and white all together to get the perfect result.
Below we have adjusted all sliders a little bit.
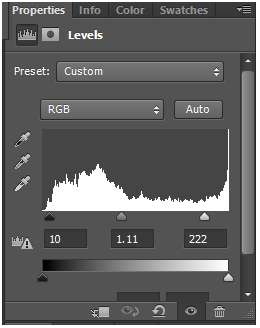
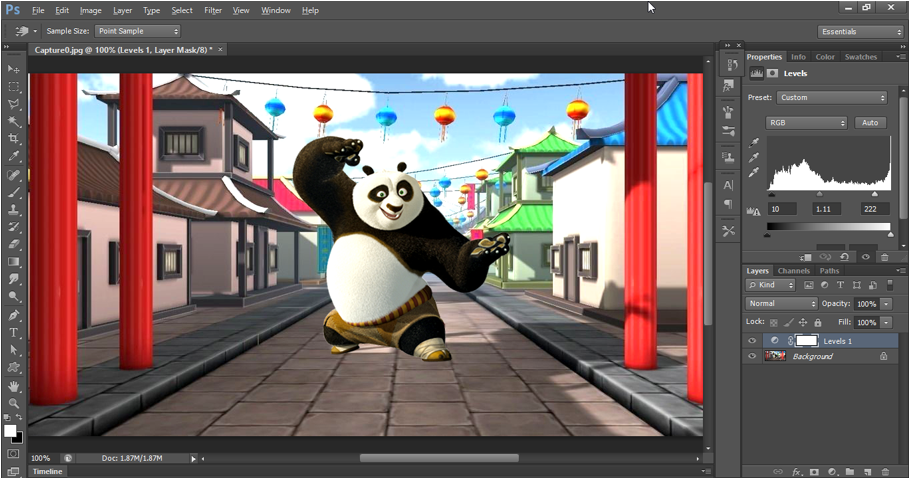
Output: Effect of adjusting Black tone/Mid tone/White together
See in below image, how we get a good contrast image.
(4) Hue/Saturation
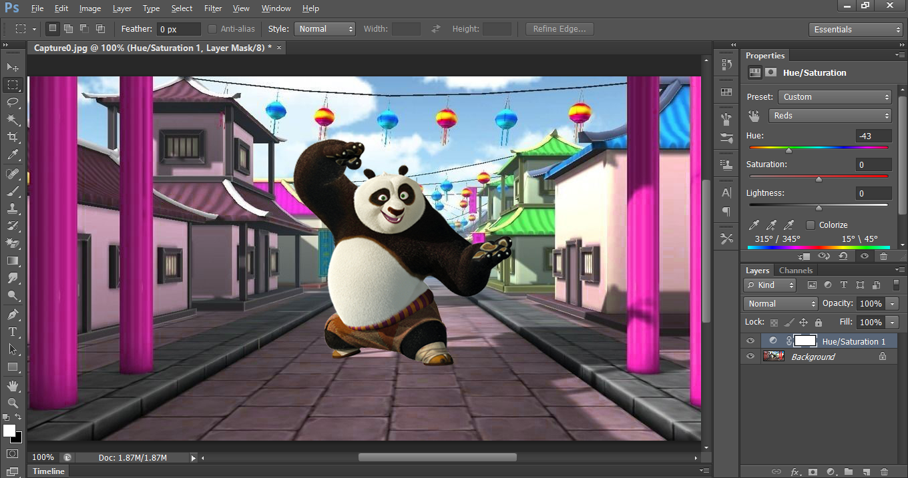
We will use this feature frequently during our tutorial. It is a nice way to change the color of an image. Then great benefit here is that we can change only particular color in an image. e.g. Here we will change the Red color in the image to any other color.
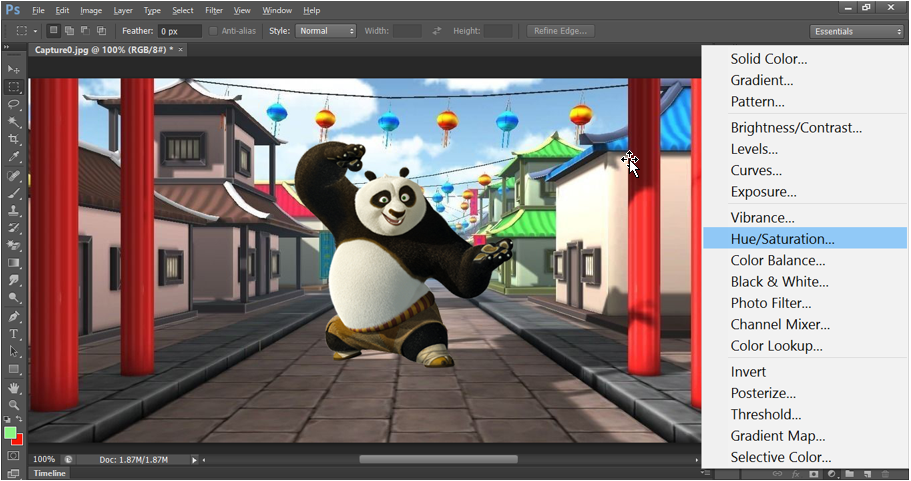
Select Hue/Saturation. Then select Reds in the Properties panel as shown below. Then adjust Hue/Saturation so that all Red color in the pic turns Red. As we can see below, only Red color has turned Pink.
This is a great benefit of using Hue/Saturation as it can change only selective color in the image.
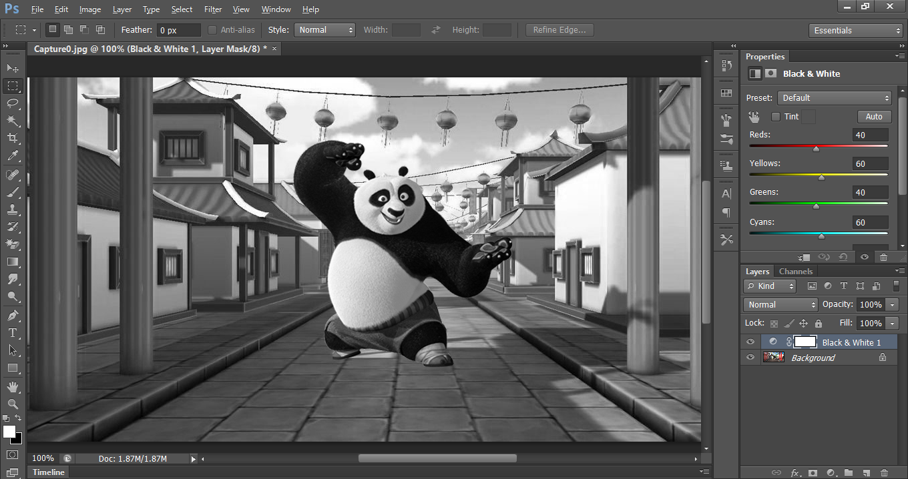
(5) Black & White
This is another great feature of Layer adjustment. We can use Black & White feature to turn a photo into black and white as shown below:
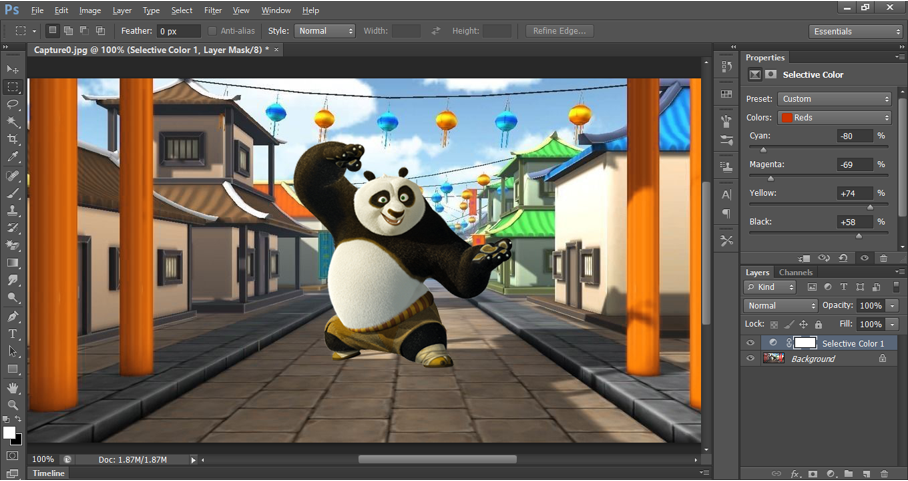
(6) Selective Color
There is another way to control the color on the layer. We can use Selective Color option. We can turn colored segments into different color.
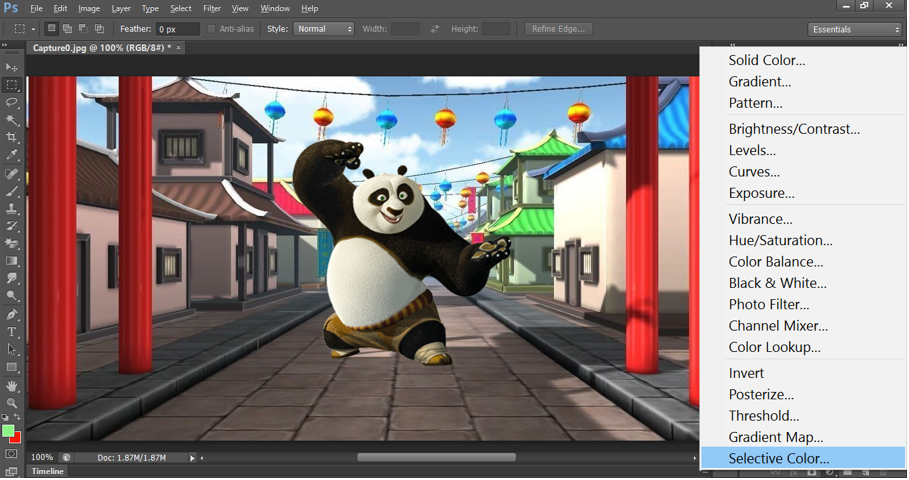
In below pic we can see that only Red color has turned yellowish orange.
