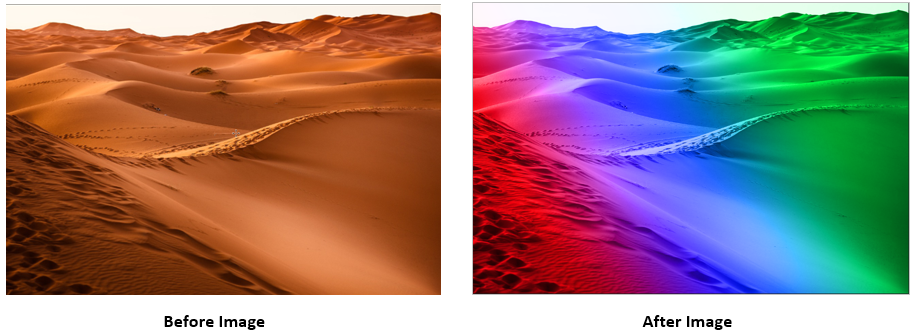
Gradient tool in Photoshop
Gradient tool in Photoshop is used to create a gradual blending effect of 2 or more colors just like rainbow.
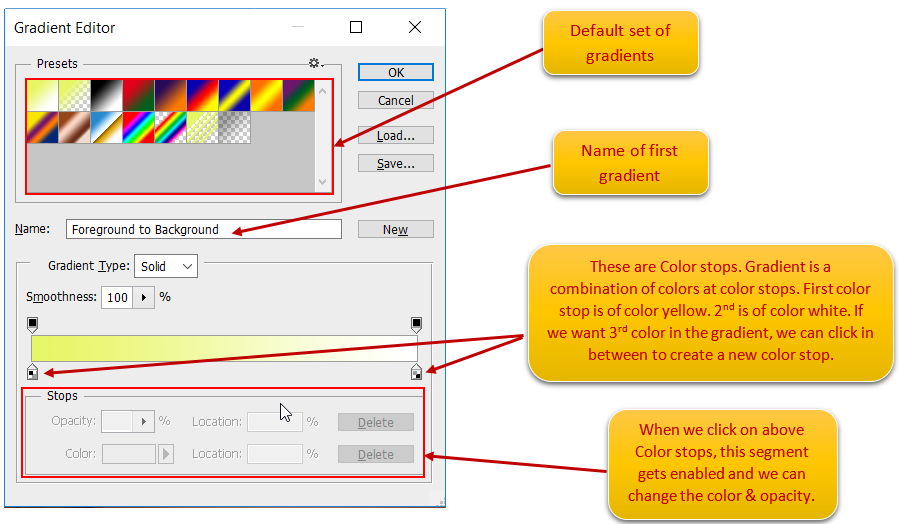
Let’s select the gradient tool  in Photoshop. We can see some default gradients appearing in the gradient list.

First gradient  in the list will be a combination of Foreground color and Background color. Here we have Foreground and background color as
  . Yellow color gradually blends with white color to create this gradient.
Types of gradient in Photoshop:
(1) Linear gradient
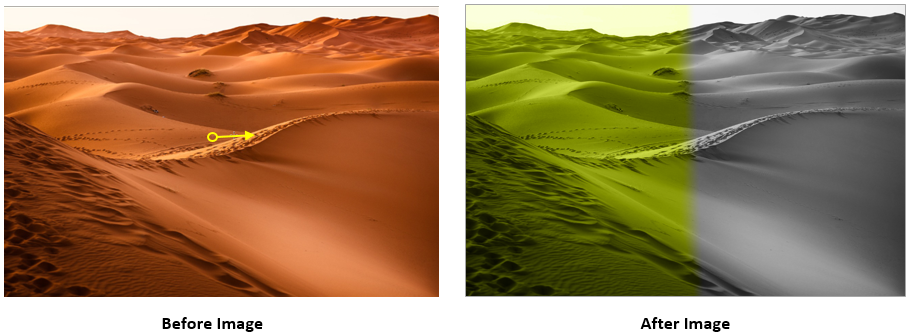
As the name suggest, the gradient will be linear in nature. The 2 color create gradient effect in a straight line. The gradient shades are created from Starting to ending point.
**Note: Longer we drag the cursor to apply the gradient, larger will be the width of gradient on the canvas.
1st Example- Linear gradient:
Select  in Option bar to draw this gradient. Select the gradient
  . Set the blend mode as Color. Drag the cursor from center to right direction to get the effect of Linear gradient.
Option bar settings:

Linear gradient Output:
2nd Example - Linear gradient:
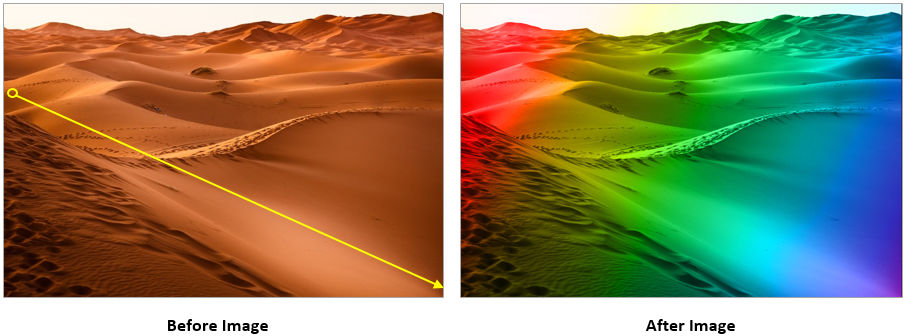
As another example, select  in Option bar to draw this gradient then select the rainbow gradient
  . Set the blend mode as Color. As we can see in below output, shades of color are created as gradient in the direction from starting to ending point.
Linear gradient Output:
(2) Radial gradient
In Radial gradient, shades are created in circular pattern.
Example: Select Radial gradient  in Option bar. Select the spectrum gradient
  . Set the blend mode as Color. Drag the cursor from center to any direction to get the effect of Radial gradient.
Radial gradient output
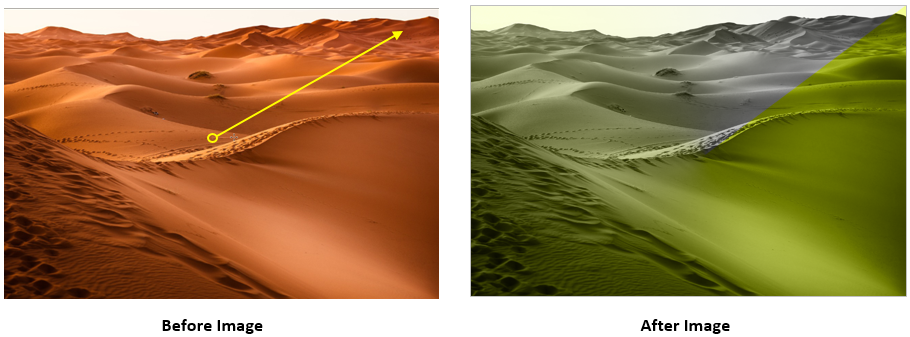
(3) Angular gradient
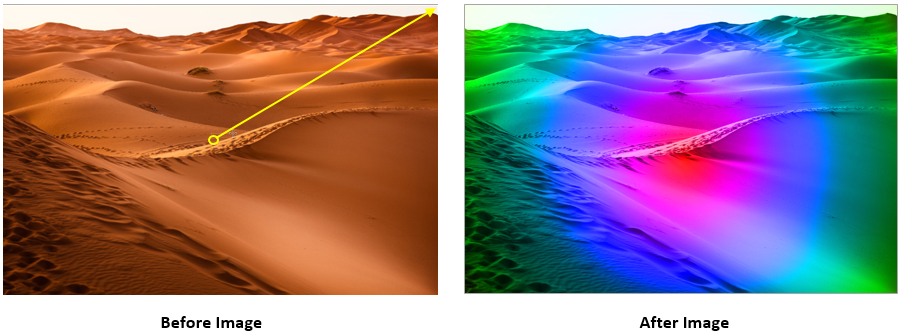
In angular gradient, the gradient shades are created as clockwise sweep around the starting point.
Example: Select  in Option bar to draw this gradient. Select the gradient
  . Set the blend mode as Color. From center drag the cursor toward top-right corner. The gradual shades of color are created in clockwise direction around starting point. See the output below:
Angular gradient output
(4) Reflected gradient
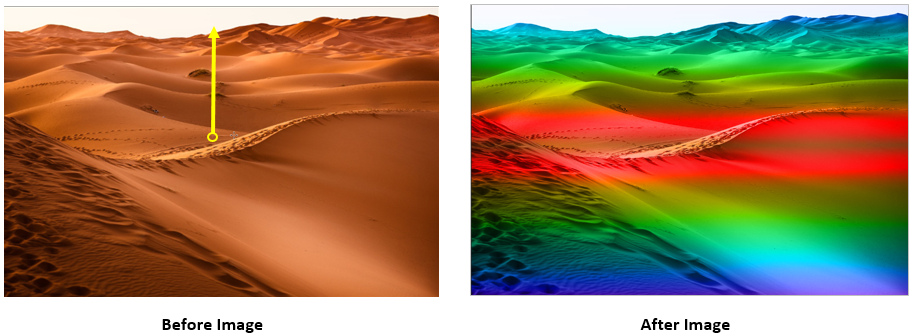
In Reflected gradient, linear gradients are created in either direction as reflection of each other from the starting point.
Example: Select  in Option bar to draw this gradient. Select the rainbow gradient
  . Set the blend mode as Color. From center drag the cursor in upper direction. Linear gradual shades of color are created in either direction around starting point. As we can see that the gradients in both direction are reflection of each other.
Reflected gradient output
(5) Diamond gradient
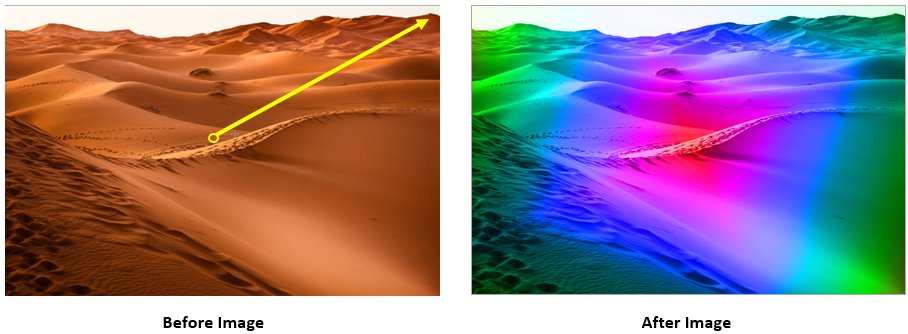
Diamond gradient creates a gradient pattern in shape of diamond.
Example: Select  in Option bar to draw this gradient. Select the rainbow spectrum gradient
  . Set the blend mode as Color. From center drag the cursor toward top-right corner. Diamond like gradient is created around starting point.
Diamond gradient output
Gradient Editor overview
We can use the Gradient editor to create a new gradient. We can use our own colors to create a new gradient using the editor.
To open the gradient editor, double click the gradient displayed in Option bar.

When we double click on the gradient, it opens gradient editor as shown below. As we can see by default it shows the settings of 1st gradient.
Create a New gradient:
Let’s create a new gradient.
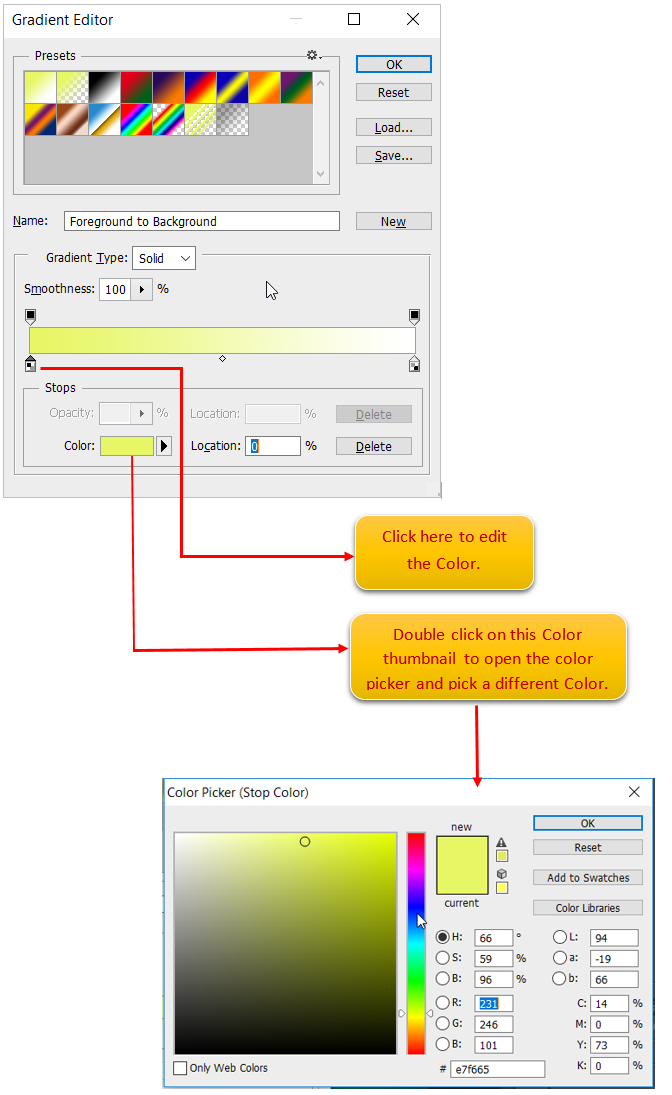
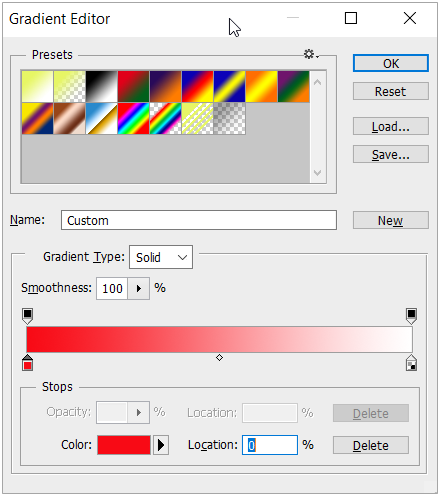
Set the color as Red for the 1st Color stop. Below is how the gradient editor looks like:
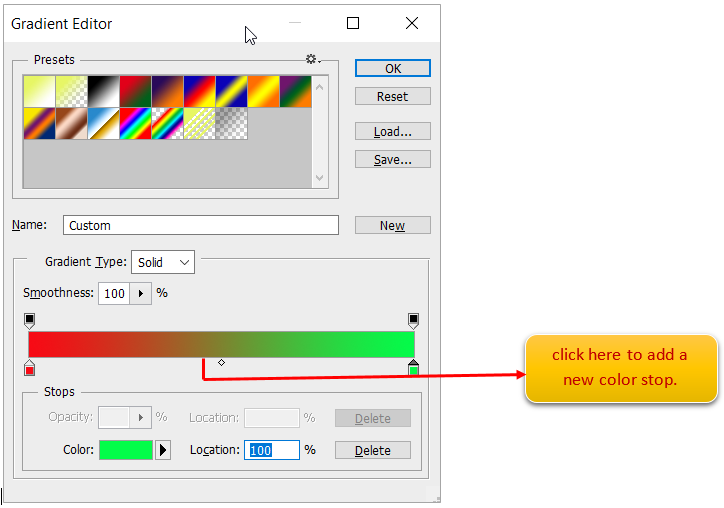
Now adjust the 2nd stop color. Set Green Color. Below is how the gradient editor looks like:
Now add a 3rd color stop by click in between 1st stop and 2nd stop. Then modify the color.
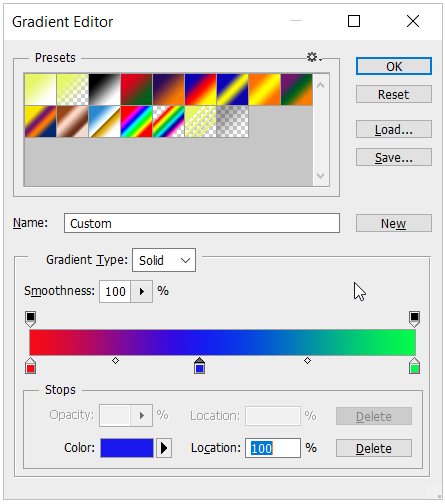
Enter the name of the gradient and click new to add the gradient.
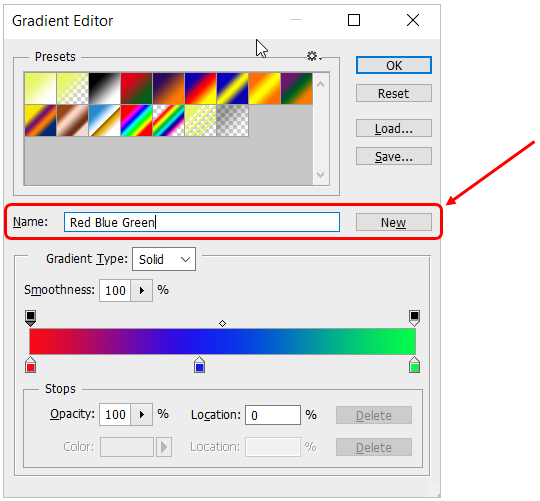
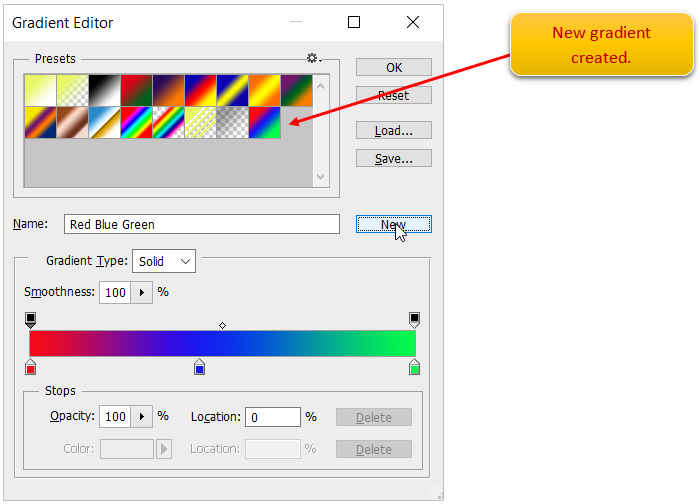
After clicking new, new gradient is added in the gradient list.
Let’s apply this new gradient on the canvas with blending mode as Color.
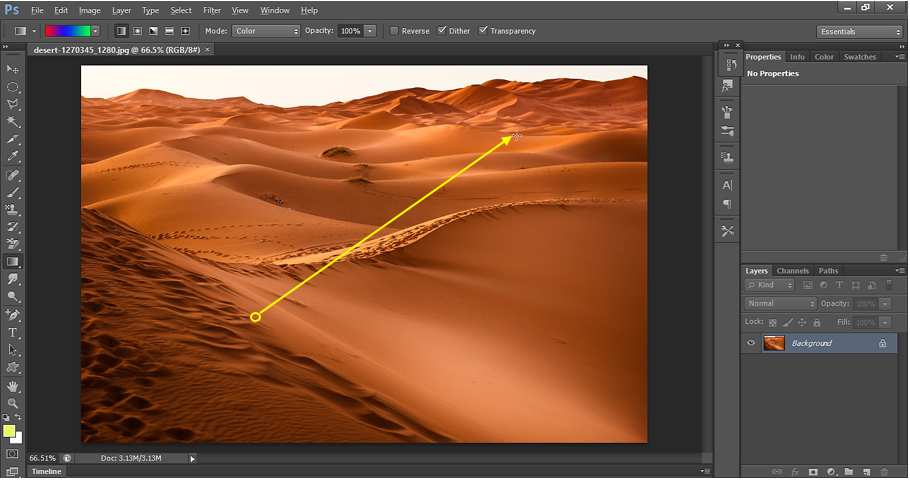
New Gradient Output:
