Manage Layers in Photoshop
In this Photoshop tutorial, we will learn about all the operations that we can perform on layers to manage it. Let’ see each operation one by one.
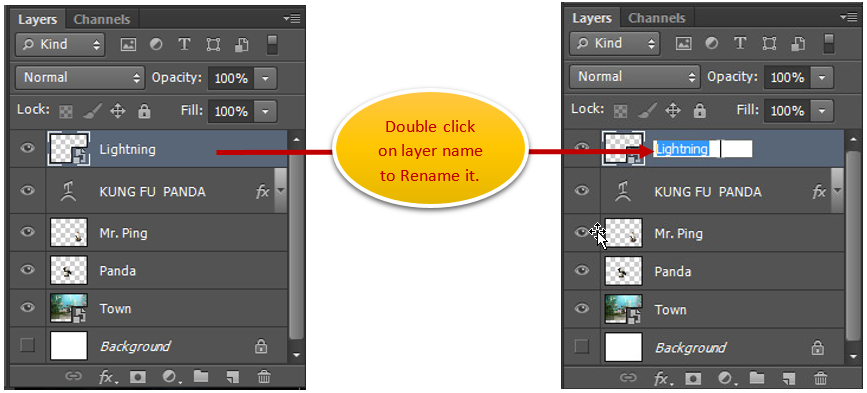
a) Rename Layer
Double click on the layer to Rename it.
b) Delete Layer
To delete the layer, first select that Layer.
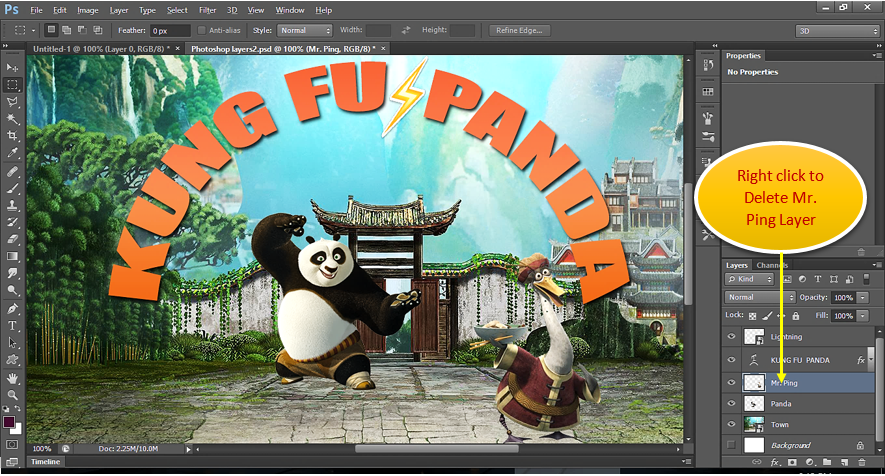
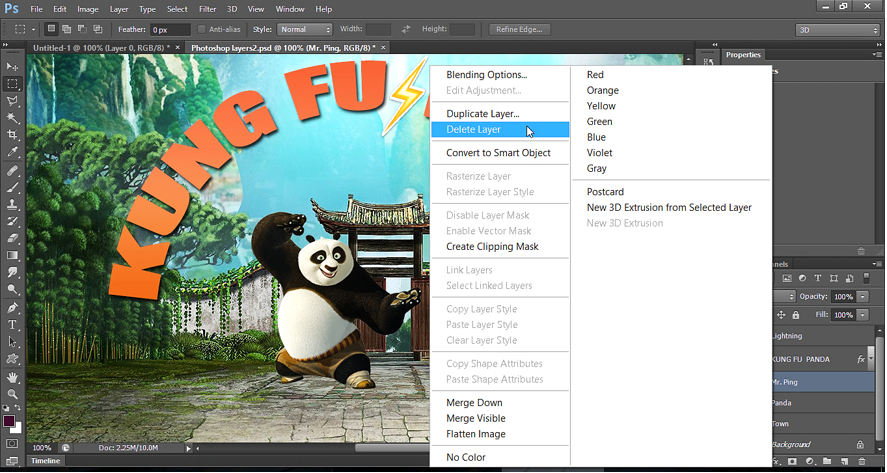
Then do right click on the layer and select “Delete Layer”.
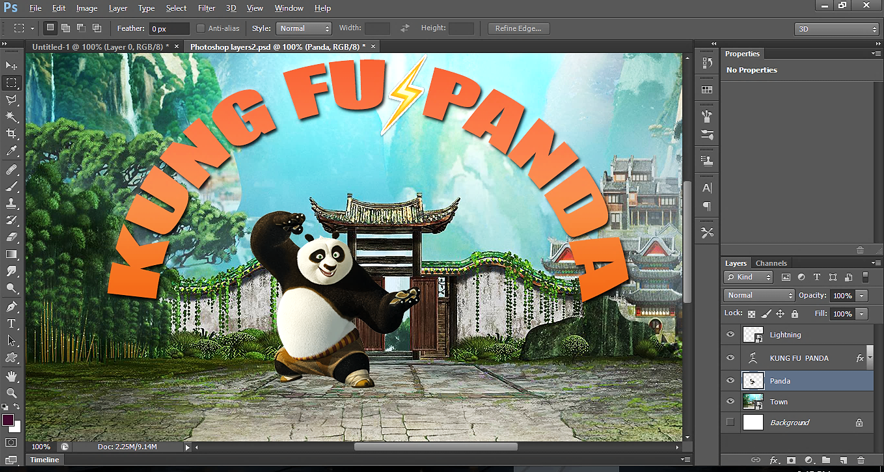
Output after deleting the Mr. Ping layer:
c) Duplicate Layer
Duplicate layer feature can be used to duplicate the image content of a layer. Right click on Panda layer to duplicate the image of Panda.
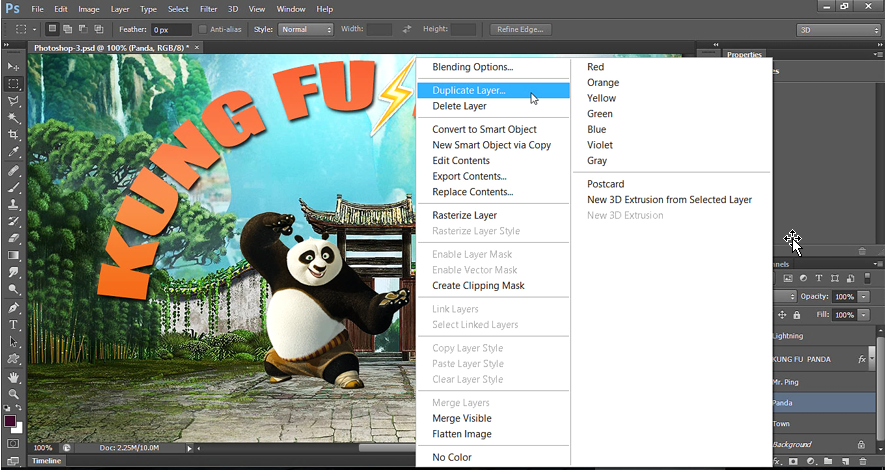
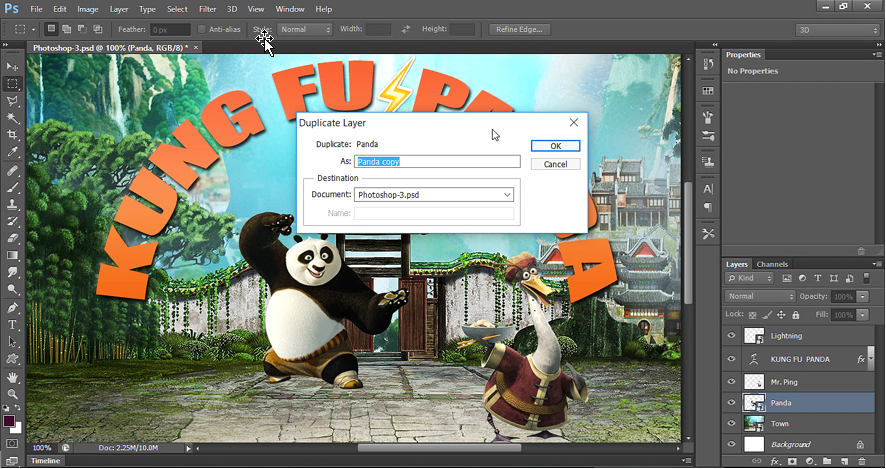
New duplicate layer appears just above the Panda layer.
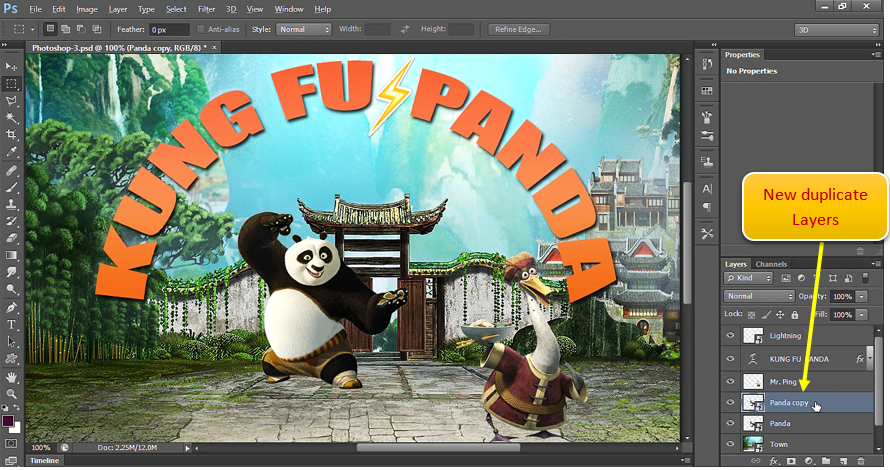
The duplicate Panda image appear on the top of original Panda image and we cannot trace if ay duplicate has been created on the canvas. But we can see a new duplicate layer created.
Click on Move tool to move the duplicate Panda image to another location.
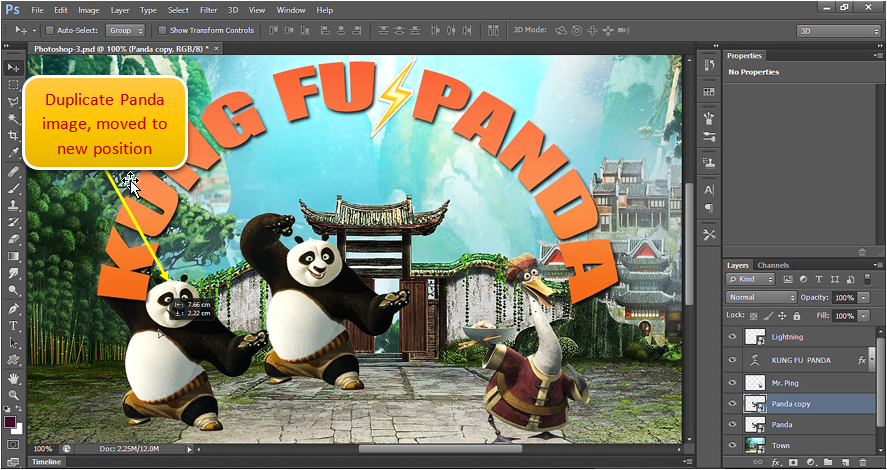
d) Hide layer
Layer’s visibility is controlled by eye icon appearing on the left of the layer.
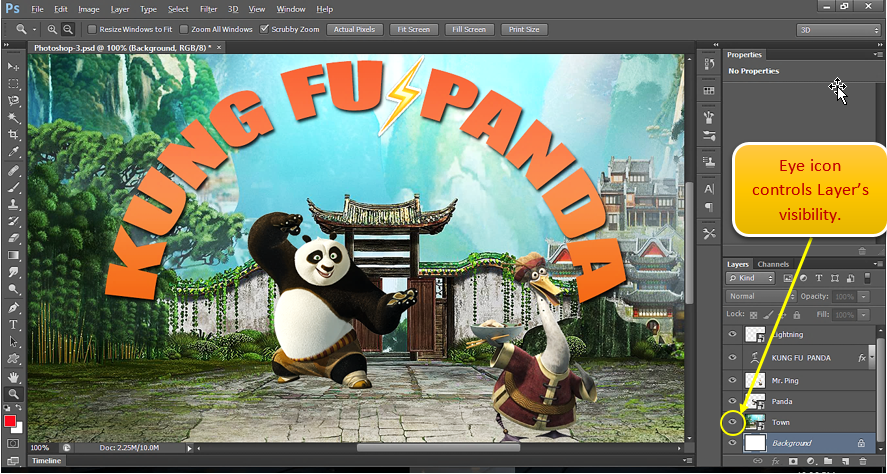
Here we will hide Town image from the canvas. Click on eye icon to Hide the image. Eye icon disappears when we click it and layer become invisible.
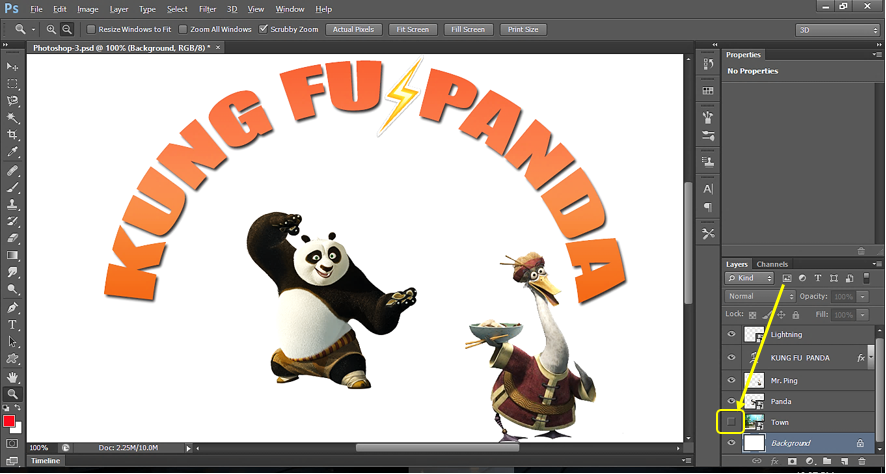
Click back again, to make it visible.
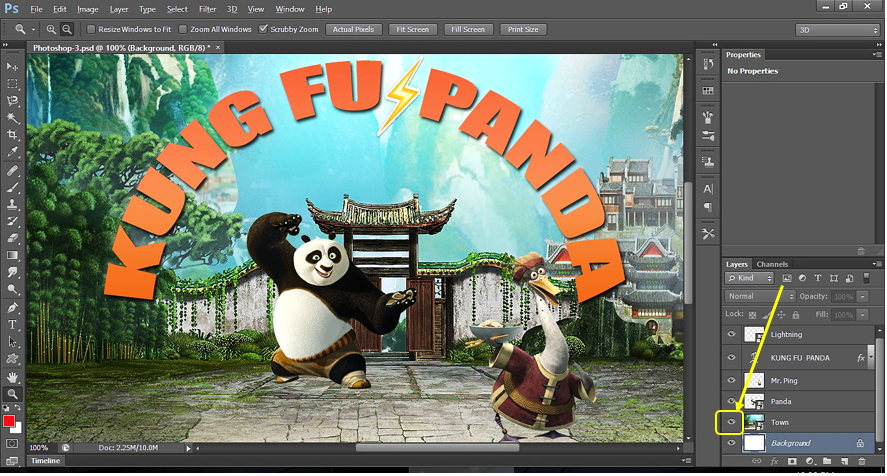
To hide multiple layer, click on eye icon of of those layers.
e) Arrange layer
As we know, layers are arranged one upon another to give the desired image. If we change the layer order, it may affect the final image.
To understand this lets see below example. This is our current document.
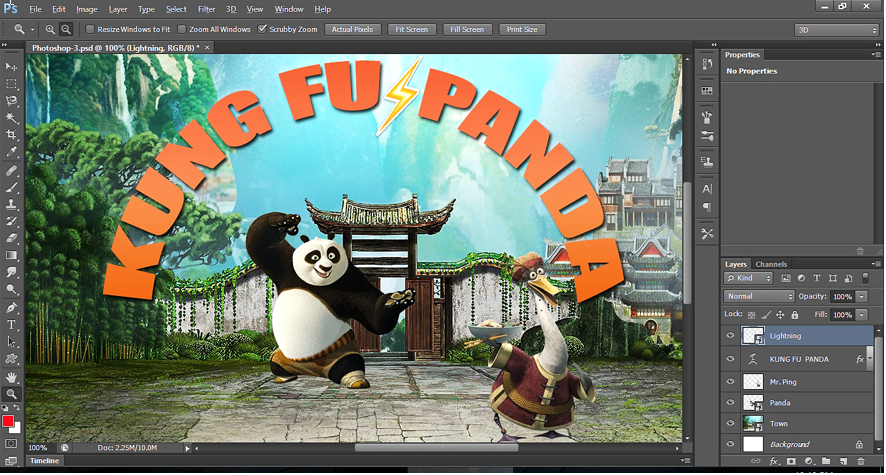
Lets drag a different background image from your desktop to the canvas. The new image comes here at the top. Since it comes at the top, all the layers below it, become invisible and we can only see the top layer as final image.

We must arrange the layers in order to make other layers appear. Move this newly added layer just below Panda layer. To move the layers down, just click on the top layer and hold it and then drag it down. Below is the new image after moving it down.

f) Rasterize layer
Before we go to the concept of Rasterize layer, we must under Raster & Vector graphics.
Mainly, we can find two types of graphics file:
I. Raster graphics
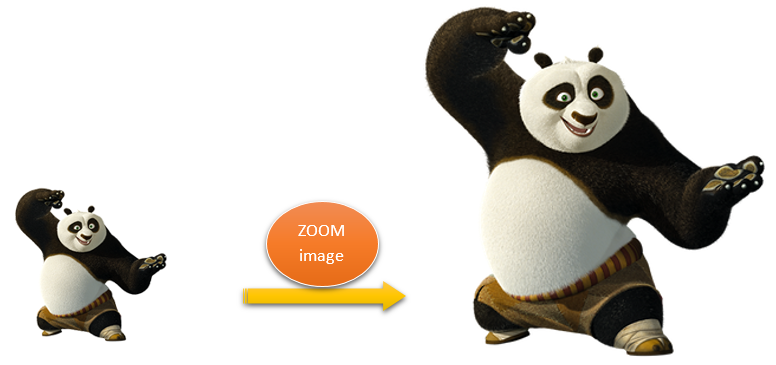
Raster images are pixel-based graphics and is the most common type of image format. Whether we take camera picture or scan something, it creates images based on pixels. We can identify it with the extension such as jpg, gif, png. This is widely used on the web. When we zoom a Raster image, it pixelates and loose its clarity. See below:

In case of Raster image, the image will be clear only when, we have more number of pixels per inch. But when we zoom the image, no. of pixels per inch decrease, which results into revealing those pixels.
II. Vector graphics
Vector images are made of thousands of lines & curves. Due to this technique of formatting the image, it becomes sharp and clear. But editing is not simple for this kind of graphics. We need advance graphics editing tool like Photoshop for this. When we want to design logo, website templates etc, we need this kind of graphics.
When we zoom Vector image, it doesn’t lose its clarity. This is because of the formatting technique(lines/curve), we use. See below
When we create a shape or a Text in Photoshop, a Vector layer is created. Vector graphics maintains its crispiness & clarity, when we zoom the graphics. But the problem here is that we cannot do Photo editing like erase, paint, brush, blur, distort, add texture or add other effects on this kidnd of graphics . The reason is that these image editing works only on pixel images. Hence, to make the photo editing possible, we must pixelerate the Vector image i.e. We must convert Vector image into Raster image(Pixel image). This process is know as Rasterize process.
g) Merge layers
Sometimes, we may need to combine two layers into one layer so that when we edit the both layer images at once.
e.g. In below image, if we move KUNG FU PANDA Text layer to some other location on the canvas, then we need to move the lightning image also after that to make lightning image aligned with KUNG FU PANDA Text. So it is better to combine KUNG FU PANDA Text layer with the Lightning layer, so that they can be moved together.
When we try to move the text layer without merging it with Lightining layer. The lightning image is left behind since it is separate layer.

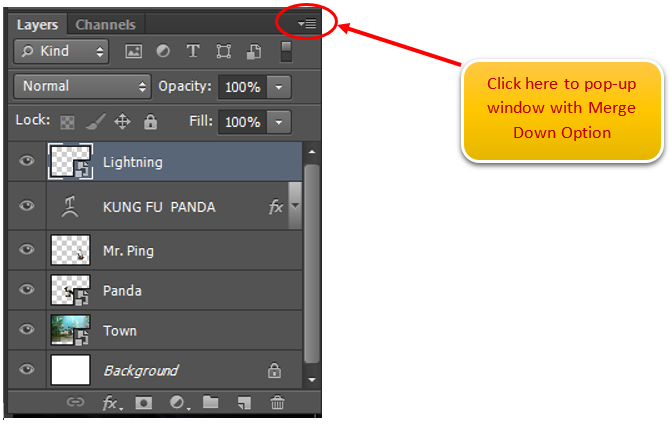
Lets merge down the Lightning layer to Text layer. Click on drop down icon the top-right of Layer panel and then click on Merge Down.
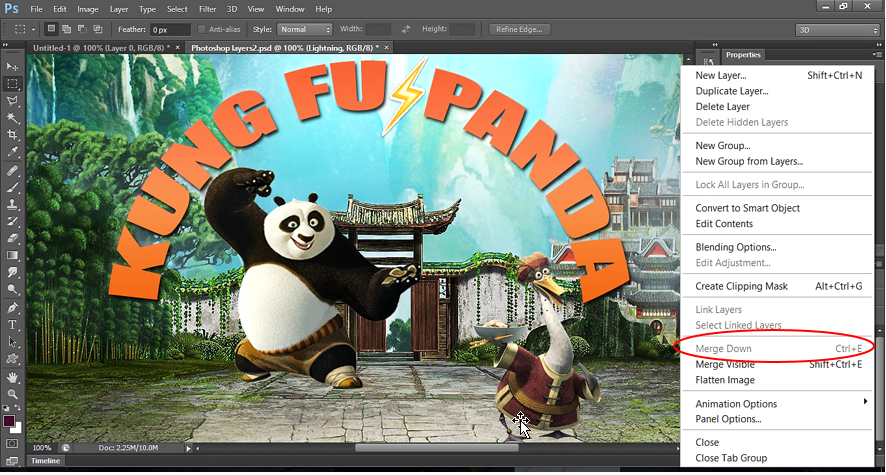
As we can see below, the Merge Down option is not active.
*Note:
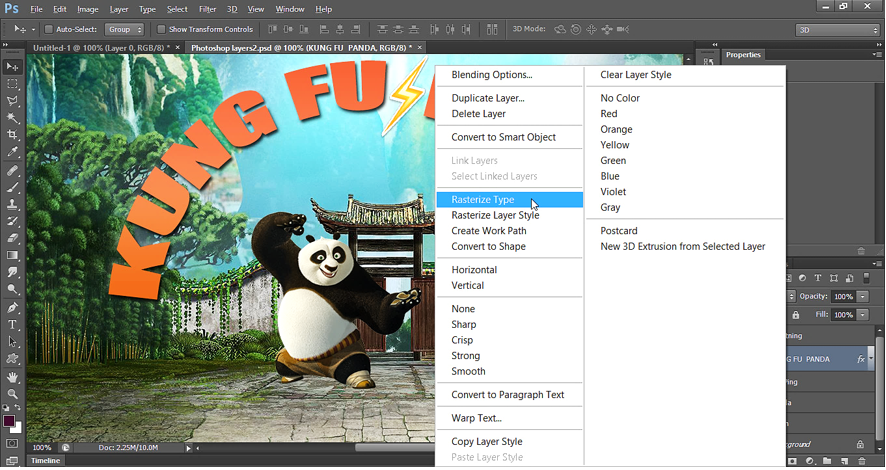
Sometimes, we cannot see the option merge down active, when we right click on the layer to Merge it down. In that case make sure the layers are Rasterized. When we use Type tool, it create a Vector graphics and we must convert it to Raster graphics. To do that, we need to Rasterize the Text layer.
Here, we must Rasterize the Text layer. To Rasterize the layer, do Right click on the layer and click on Rasterize Type as shown below.
Now click on Lightning layer then do right click to Merge down the image to Text layer.
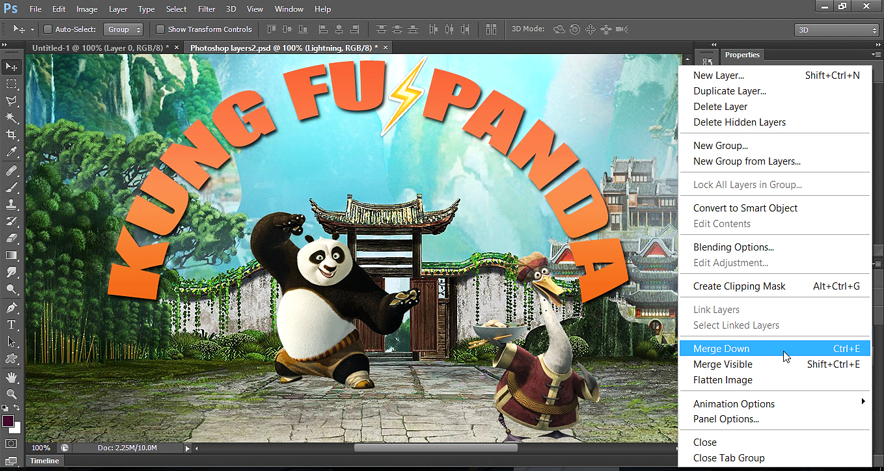
After we merge the layers, the Text and lightning combines with each other. So, when we move the image, both moves together.

h) Merge Visible
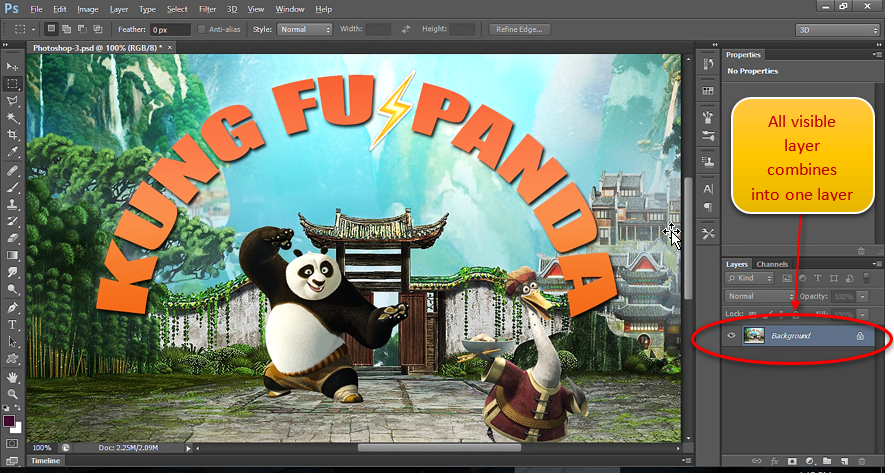
‘Merge Visible’ is also used to merge the layers. With this feature, we can merge all visible layer at once. Hence, whatever layers we want to merge, we can make those visible and can keep rest of the layers invisible.
To merge visible, click on drop down icon the top-right of Layer panel and then click on Merge Visible.
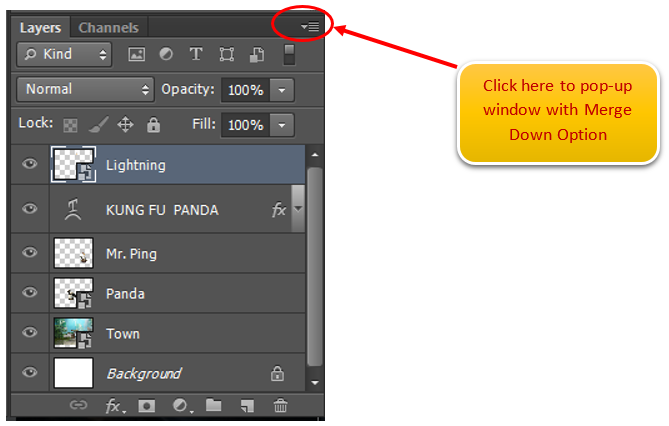
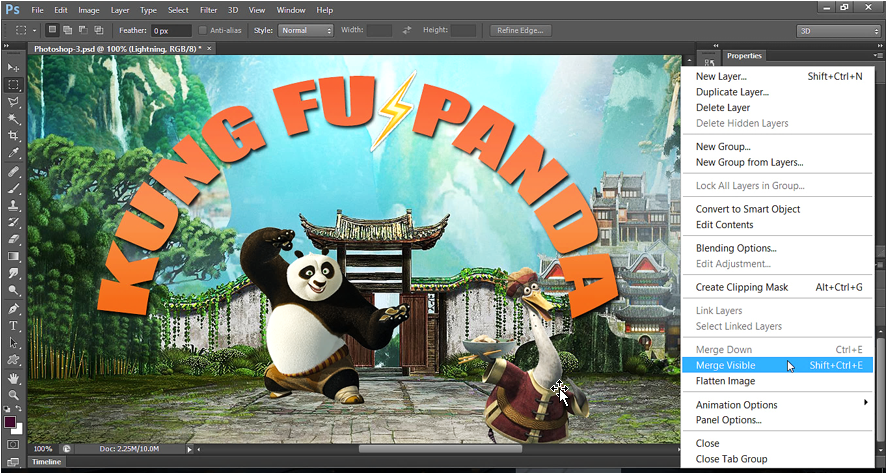
Below, we can see the Merge visible option.
After Merge visible, all layer combines into one layer:
i) Group Layer
‘Group layer’ is another technique to combine the layers.
It is the recommended option if we compare to options ‘Merge Layer’ and ‘Merge Visible’.
We can group any numbers of layers in any order into one. To select multiple layers by pressing & holding Ctrl key, then selecting different layers.
Let’s see it with example.
In example below, the current selected Layer is Lightning layer. I want to create a group 2 layers – (i) Lightning layer (ii) KUNG FU PANDA layer
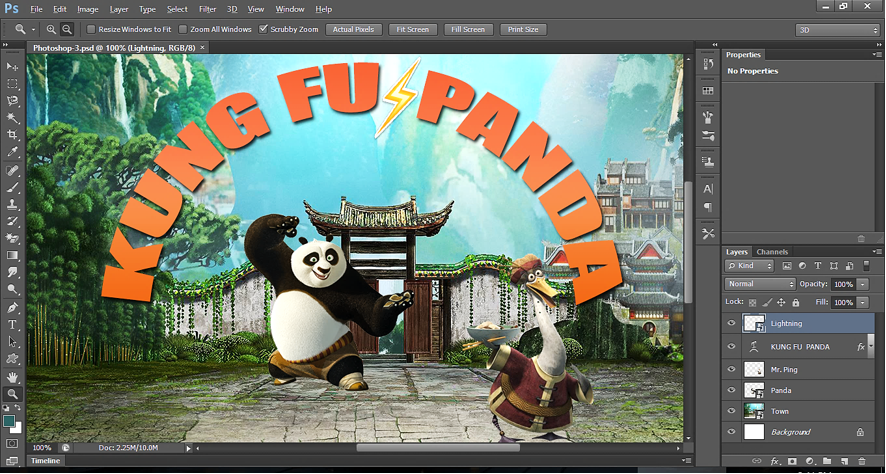
We must have the 2nd layer also selected, so that we can create a group of these 2 layers. Just press & hold Ctrl key, then click on 2nd layer KUNG FU PANDA. As we see below, now we have 2 Layers selected - Lightning layer & KUNG FU PANDA layer. You can keep holding Ctrl key and then can select as many layers as you want to the group.
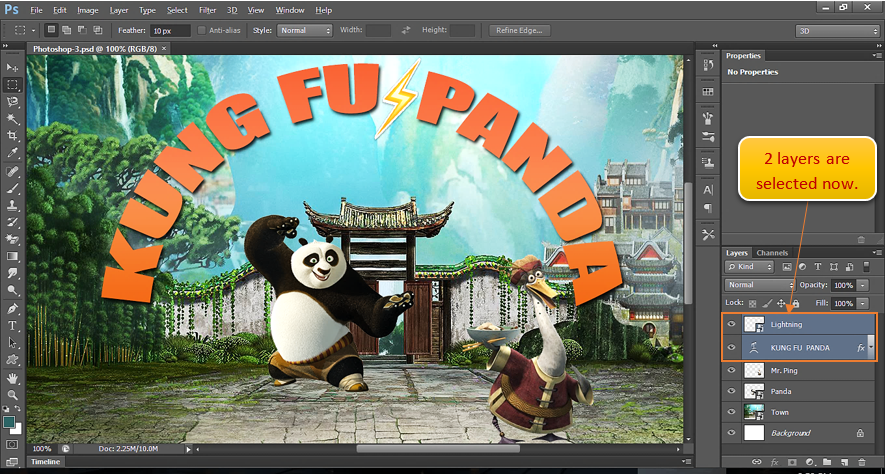
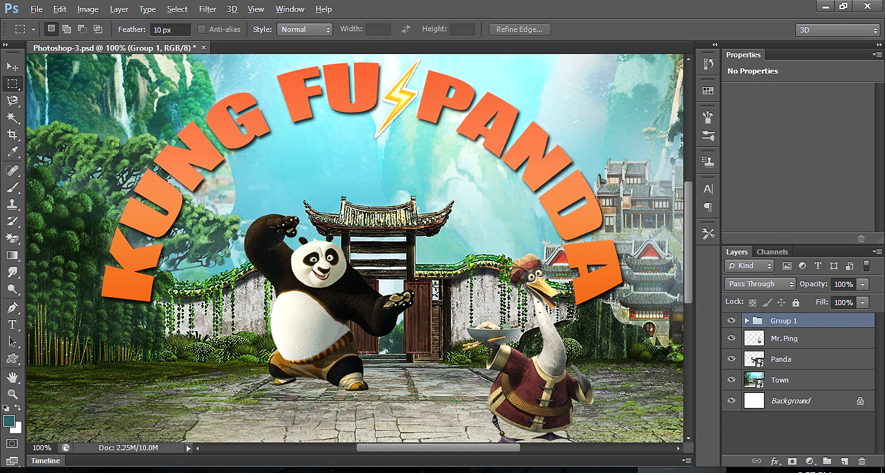
To group layers, go to Layer menu, then click Group layers.

It creates a new group of layers named as ‘Group 1’
Benefit of using Group of Layers instead of Merge visible/ Merge Layer:
I. We can Ungroup it to get back all individual layer
The first benefit of using Group of Layers is that, we can ungroup the layers whenever we want.
To ungroup, do right click on ‘Group 1’, then select Ungroup:

II. We can Delete the Group to Delete all layers of group at one or can only delete the group structure to get back all individual layer
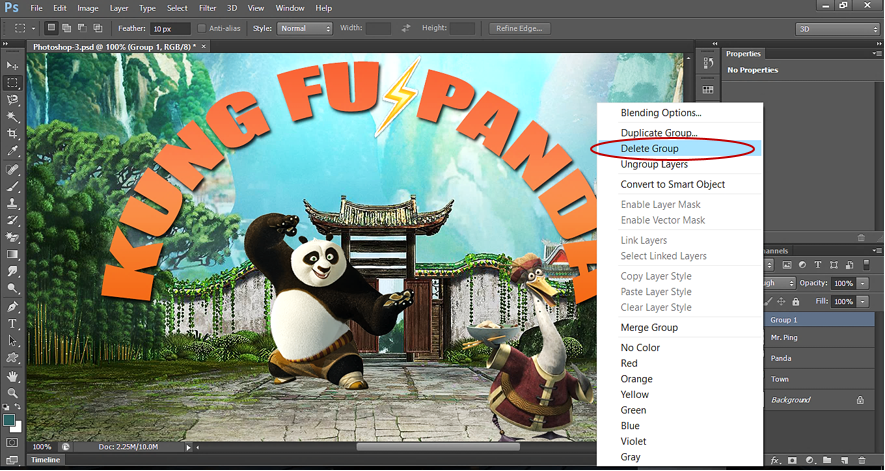
After selecting Delete option, we can Delete ‘Group and Contents’ or we can delete ‘Group Only’, so that we get back all individual layers.

If we select ‘Group Only’, we get back all individual layers.

As we know, we cannot do this with Merge Visible/ Merge Layer. Only option we can get back our layer is after these methods are going back in history.